
An old wall does not have to be perfectly straight for a new interior door and casing to look clean.
But the installer needs to understand which parts of the opening must be mechanically correct and which parts have to be fitted visually to the existing home.
The door jamb needs to be installed plumb and positioned so the door can swing, stay where it is left and latch properly. The casing needs to maintain a clean reveal around the jamb while meeting a plaster wall that may bow, lean or change thickness from one side of the opening to the other.
Those two requirements do not always agree naturally.
If the jamb is forced to follow an uneven wall, the door may not operate properly. If perfectly straight casing is forced tightly against every wave in the plaster, the mitres may open, the profile may twist and the reveal may become inconsistent.
The job is not to pretend the wall is perfect.
The job is to understand the real condition, install the door correctly and make the transition to the surrounding wall look intentional.
★★★★★
76 Google Reviews.
Earned One Job at a Time.
Real projects. Real homes. Real customers.
Wood Job Finish Carpentry is an owner-led finish carpentry business installing doors and trim in Oakville, Milton, Mississauga, Burlington, Cambridge, Guelph, Kitchener, Hamilton, Vaughan, Toronto and surrounding areas.
Uneven Plaster Does Not Automatically Mean a Structural Problem
Uneven walls are common in older homes.
Traditional plaster may vary in thickness. Framing may have moved slightly over time. Previous renovations may have added drywall, patches or layers of paint. An opening may have been repaired several times by different people.
A wall that bows or leans does not automatically mean the home has a structural failure.
Finish carpentry should not be used to make structural diagnoses.
However, a carpenter should recognize when the condition falls outside ordinary fitting work.
Warning signs that may need further investigation include:
- Large or recently developing cracks
- Significant movement around the opening
- Loose framing
- A header that appears damaged or unsupported
- Severe floor movement
- Moisture damage
- Plaster separating extensively from its base
- An opening that continues to change after previous repairs
In those situations, the homeowner or contractor may need to involve the appropriate renovation professional before new doors and trim are installed.
Most uneven-wall situations are less dramatic.
They are ordinary renovation conditions that require careful measuring, realistic expectations and the right fitting method.
Three Different Surfaces Have to Work Together
Around a door opening, the carpenter is managing three different things:
- The door and jamb
- The casing and reveal
- The existing wall
They are connected, but they do not have the same job.
The door and jamb control how the door operates
The hinge jamb should normally be plumb.
The head jamb should be positioned so the reveal above the door remains clean and the slab does not rub.
The latch jamb should allow a consistent gap and proper strike-plate alignment.
If the jamb is twisted to follow a crooked wall, the door may bind, swing by itself or refuse to sit against the stop evenly.
The casing frames the opening
Casing covers the transition between the jamb and wall, but it also creates a visible frame around the door.
The reveal—the small portion of jamb visible inside the casing—should look consistent.
If the casing is moved repeatedly to follow every wave in the plaster, that reveal can become narrow in one area and wide in another.
The wall remains part of the existing house
The surrounding plaster may not be plumb, flat or consistent.
Sometimes it can be repaired before the trim is installed.
Sometimes minor variations can be absorbed through careful fitting.
Sometimes the trim needs to be scribed, relieved or adjusted.
The carpenter has to decide where correction is necessary and where trying to force perfection would create more damage than improvement.
What Should Be Checked Before the Old Trim Is Removed?
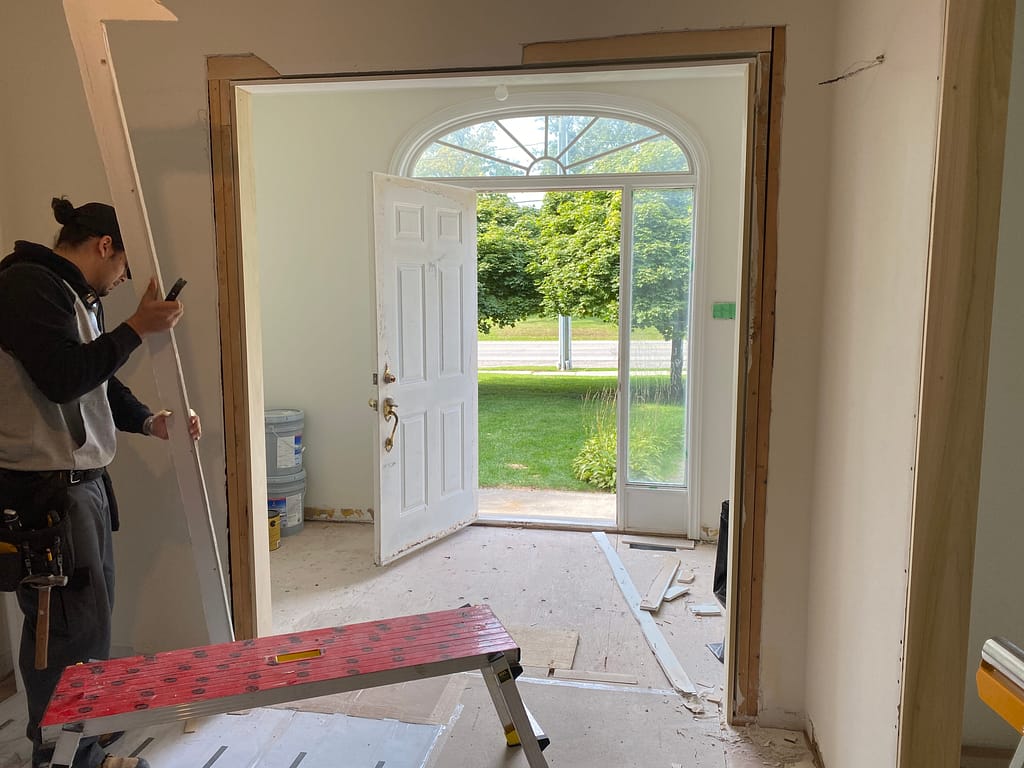
Before removing an existing door or casing, I first look at how the opening currently behaves.
Useful observations include:
- Whether the door rubs
- Whether it swings open or closed by itself
- Whether it latches cleanly
- Whether the reveal is consistent
- Whether the jamb sits flush with the wall
- Whether the casing rocks or pulls away
- Whether the mitres have opened
- Whether the wall is proud of the jamb
- Whether the jamb projects beyond the wall
- Whether the plaster is loose or damaged
- Whether the baseboard meets the casing cleanly
- Whether old paint or caulking is hiding a larger gap
A level or laser can help show how the wall and opening relate to each other.
But the tool does not make the decision by itself.
A wall may be visibly out of plumb while the existing door operates properly. Another opening may appear acceptable from a distance but contain a twisted jamb that causes the door to rub and swing.
The carpenter has to read both the measurement and the way the opening behaves.
If the existing door already rubs, sticks, swings by itself or refuses to latch, our guide to interior door problems and what they may mean explains the most common causes.
The Door Jamb Should Not Simply Follow the Wall
One of the most important principles is this:
The door jamb controls the door. The wall should not be allowed to pull the jamb out of alignment.
Suppose the plaster wall leans inward near the top of the opening.
If the jamb is nailed directly against that surface without checking plumb, the hinge pivots may no longer sit vertically above one another. Gravity can then cause the door to move after it is released.
The door may:
- Swing open by itself
- Drift closed
- Rub near one corner
- Show a tight reveal at the top and a wide reveal at the bottom
- Miss the strike plate
- Sit unevenly against the door stop
A correctly installed jamb may therefore sit slightly differently from the surrounding wall.
That difference then has to be handled at the casing and wall transition.
The solution is not to twist the jamb until it matches the plaster.
The solution is to install the jamb for proper door operation and then determine the cleanest way to finish the visible transition.
For larger door replacement projects, Wood Job’s interior door installation service explains what we check around the jamb, hinges, latch, flooring and surrounding trim.
A Prehung Door Does Not Automatically Correct an Uneven Opening
A prehung door can be a good choice when the existing jamb is damaged, missing or not worth keeping.
But a factory-prepared prehung unit does not make an uneven opening disappear.
The new unit still has to be installed inside the actual rough opening.
The carpenter may still encounter:
- Twisted studs
- A rough opening that narrows near the top
- Inconsistent wall thickness
- Plaster extending into the opening
- Insufficient shimming space
- Flooring that rises on one side
- Drywall or plaster sitting proud of the jamb
- A wall that is not parallel from one side to the other
The prehung unit must be positioned and shimmed so the door works.
It should not be forced to copy the shape of the rough opening.
This is why doors should be measured and reviewed before they are ordered. Our guide to the 12 details that should be confirmed before ordering interior doors covers the slab, jamb, hinges, hardware, flooring and other decisions that can affect the order.
Wall Thickness Can Change Around the Same Opening
In a straightforward modern wall, the jamb depth may remain consistent from top to bottom.
In an older plaster wall, that cannot always be assumed.
The wall may be:
- Thicker near the bottom
- Built out around a previous repair
- Proud of the jamb on one side
- Recessed behind the jamb on the other
- Covered with plaster over old drywall
- Patched with a different material
- Tiled or panelled on only one side
- Out of parallel across the opening
A single jamb-depth measurement may therefore be misleading.
The depth should be checked at several points around the opening.
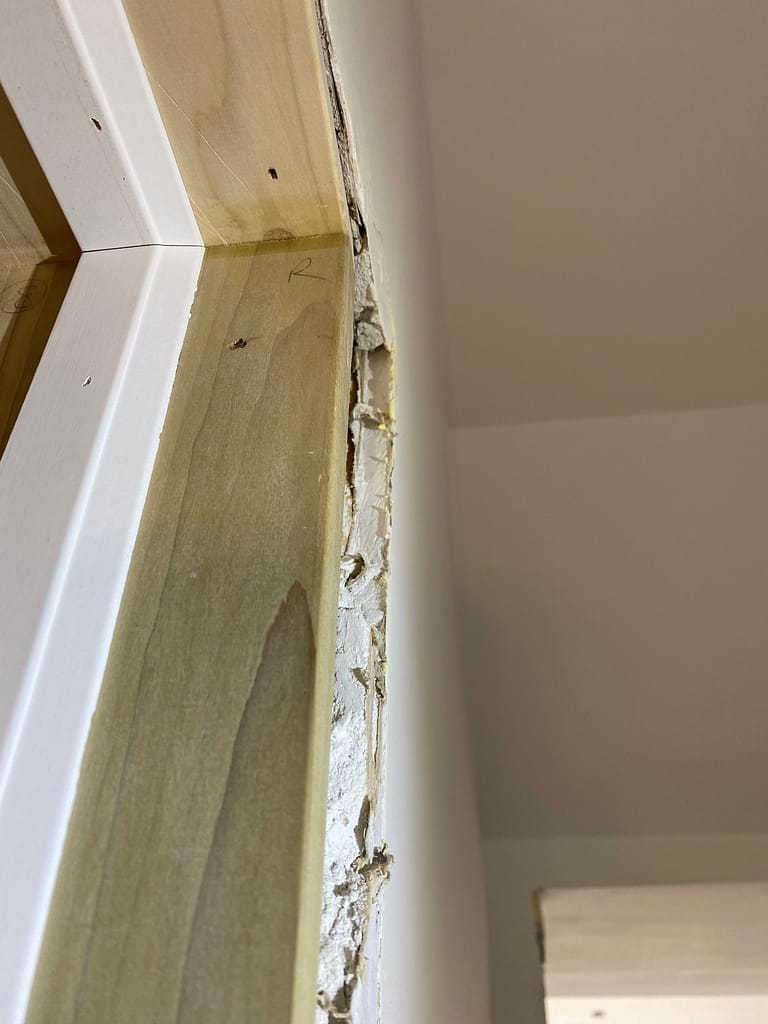
If the jamb is too narrow, the casing may rock between the jamb and the wall. A visible gap may appear along one edge.
If the jamb is too wide, it may sit beyond the finished wall surface and prevent the casing from lying properly.
Depending on the condition, the solution may include:
- A properly sized new jamb
- A custom jamb
- A tapered jamb extension
- Selective wall preparation
- Relieving the back of the casing
- Scribing the trim
- A combination of small adjustments
A jamb extension is useful when it solves a real difference in wall depth. It should not automatically be used to rescue material that was ordered incorrectly.
Wood Job’s baseboard, casing and interior trim service includes door casing, window casing, jamb extensions and trim fitted to real wall conditions.
How Casing Can Be Fitted to an Uneven Plaster Wall
There is no single technique that works for every opening.
The right approach depends on the size of the variation, the casing material, the profile, the reveal and the condition of the plaster.
Minor gaps may be finished with paint-grade caulking
A small, consistent gap between paint-grade casing and the wall can often be caulked after installation.
This is a normal finishing detail.
But caulking has limits.
It should not be expected to fill a large hollow behind the casing, hide a twisted jamb or replace missing wall preparation.
A wide caulk line can make the casing look wavy even when the trim itself is straight.
The goal is not to use as much caulk as necessary.
The goal is to fit the trim closely enough that the final paint preparation remains controlled.
The back of the casing can sometimes be relieved
If a small plaster hump prevents the casing from sitting properly, material can sometimes be removed carefully from the back of the trim.
This allows the face of the casing to remain in a better plane without aggressively removing old plaster.
The adjustment has to be controlled.
Removing too much from the back can weaken a narrow casing or change how the profile sits against the jamb.
Casing can be scribed where the wall variation is larger
Scribing transfers the shape of the wall onto the trim so the edge can be fitted more closely to the actual surface.
This can be useful around:
- Bowed plaster walls
- Deep jamb extensions
- Window returns
- Baseboards meeting uneven floors
- Large openings
- Trim beside stone, tile or other irregular materials
Scribing is not always about following every tiny wave.
Sometimes following the wall too closely makes a long trim line look worse to the eye.
The carpenter must decide how much of the irregularity should be followed and where a straighter visual line gives the cleaner result.
Mitres may be assembled before the casing is installed
On some paint-grade casing projects, the mitred corners can be glued and assembled before the complete casing frame is placed around the jamb.
This can help the two corners remain aligned rather than allowing an uneven wall to push each piece in a different direction.
It does not remove the need for fitting.
The completed frame still has to sit over the opening with a consistent reveal and a reasonable transition to the wall.
Pre-assembly is one available method—not a rule for every profile or every opening.
Wider casing can help, but it does not solve everything
A wider profile may cover damaged plaster, old paint lines or a larger space between the jamb and wall.
But wider casing is not automatically more forgiving.
A wide, flat casing can make a bowed wall more obvious because more of the material is trying to meet the uneven surface.
The profile also has to work with:
- The baseboard
- Nearby walls
- Light switches
- Cabinets
- Closely spaced door openings
- Existing window trim
- The proportions of the room
Casing should be selected as part of the whole trim package, not only as a way to hide a difficult wall.
Should the Casing Follow the Wall or Stay Straight?
Usually, the answer is somewhere between the two extremes.
Forcing the casing completely flat against a badly bowed wall can twist the profile and open the mitres.
Holding it perfectly straight regardless of the wall may leave an unnecessarily large gap.
The carpenter may allow the casing to follow a small amount of the wall variation while protecting:
- The mitred corners
- The jamb reveal
- The face alignment
- The connection to the baseboard
- The overall visual line
Good finish carpentry often involves choosing which line matters most.
A tape measure may show that the wall moves.
The eye still expects the door and casing to feel calm and balanced.
Baseboards Have the Same Problem at the Wall and Floor
Uneven plaster walls do not affect only door casing.
Baseboards may also meet walls that bow in and out, together with floors that rise and fall.
A baseboard can be perfectly straight when it leaves the saw and still show gaps after it reaches the room.
The installer may have to decide:
- How closely the baseboard should follow the wall
- Whether the wall needs preparation
- Whether the bottom should be scribed
- Whether shoe moulding is appropriate
- How the baseboard should meet the door casing
- Whether an outside corner can remain aligned
- Whether long runs should be joined or adjusted differently
Modern flat-stock baseboards can be especially revealing.
Their simple profile leaves less visual distraction, so waves, open joints and inconsistent transitions become easier to notice.
Shoe moulding may help follow minor floor variations, but it does not correct a baseboard installed badly against the wall.
The baseboard, casing and floor need to be considered together.
When Should the Wall Be Repaired Before the Trim Is Installed?
Not every plaster imperfection needs to be removed.
Old walls are rarely perfect, and aggressive demolition can turn a controlled finish carpentry project into a much larger renovation.
Wall preparation may still be necessary when:
- Loose plaster prevents safe fastening
- A large hump pushes the casing far out of plane
- A deep hollow would require excessive caulking
- The jamb cannot be installed properly because material projects into the opening
- The wall edge is badly broken after old casing removal
- The finished wall thickness changes too abruptly
- Moisture damage is present
- The surface is too weak to support the final finish
The repair may involve the drywall or plaster trade, depending on the condition.
The carpenter should explain what needs to be corrected before continuing rather than trying to bury every problem behind wider trim.
A casing is there to finish an opening.
It is not a substitute for a stable wall.
Can Original Trim Be Reused?
Sometimes.
Original wood casing can be worth preserving when it is:
- In good condition
- Difficult to match
- Appropriate to the age and character of the home
- Thick enough to survive removal and preparation
- Not buried under excessive layers of brittle paint
- Compatible with the new jamb and door
But removal always carries risk.
Old casing may split. Mitres may separate. Nails may damage the face. Paint may chip. The profile may have already been cut tightly for the old opening and leave little room for adjustment.
The carpenter should inspect the material before promising that every piece can be saved.
If reuse is important, that should be discussed before demolition begins.
Sometimes the correct solution is to reinstall the original casing.
Sometimes matching new trim is safer.
Sometimes the door can be improved while the existing jamb and casing remain in place.
The answer depends on the condition of the individual opening.
What Not to Do Around an Uneven Door Opening
Several shortcuts tend to create new problems instead of solving the existing one.
Do not twist the jamb to match the wall
The door depends on the jamb being aligned properly.
A jamb should not be sacrificed simply to make the outer edge sit flush against leaning plaster.
Do not use oversized caulk joints as the main repair
Caulking is useful for small paint-grade gaps.
It should not become the material holding the visual shape of the opening together.
Do not force the casing until the mitre opens
If the wall pushes the two casing legs into different planes, fastening them harder may pull the corner apart.
The condition needs to be fitted, relieved, scribed or prepared.
Do not move the strike plate repeatedly without checking the door
A large or repeatedly altered strike opening may hide a sagging door, loose hinge or twisted jamb.
The latch should be aligned after the door itself is sitting properly.
Do not assume every point around the opening has the same depth
Older plaster walls can change thickness from top to bottom and from one side to the other.
One measurement is rarely enough for a custom jamb or extension.
Do not promise perfection where the house cannot provide it
There is a difference between careful finish work and pretending an old home is newly framed.
The goal should be a door that operates properly, trim that looks balanced and transitions that are handled honestly.
The Best Time to Find These Problems
During a larger renovation, uneven or twisted openings should ideally be reviewed:
- After framing
- Before drywall or plaster repair
- Before doors and jambs are ordered
- Before final flooring
- Before the painter completes the finish coats
At that stage, an opening can often be corrected without damaging completed work.
A stud can be adjusted. Wall thickness can be confirmed. The correct jamb can be ordered. Additional backing can be installed. Casing space can be reviewed.
Once the walls, flooring and paint are finished, the same correction becomes more disruptive.
This is why I prefer the finish carpenter to be involved before the final materials arrive. When Should a Contractor Call a Finish Carpenter? explains why the period between framing and drywall is so valuable for doors and trim.
What a Good Finished Result Should Look and Feel Like
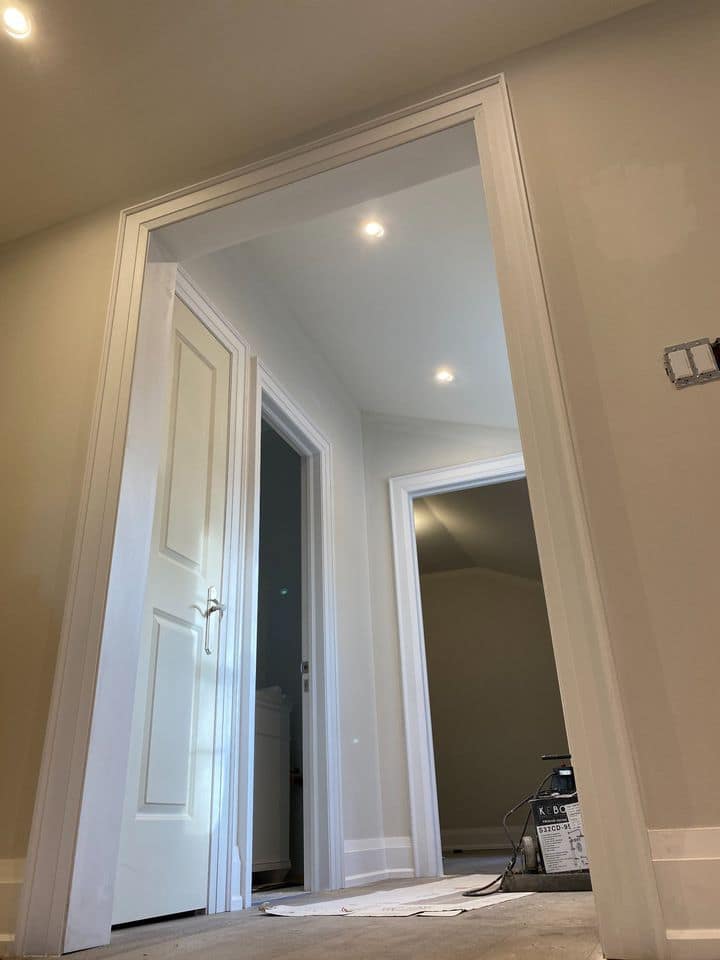
In an imperfect opening, a good result is not defined by pretending every surface is mathematically perfect.
A good result should give you:
- A door that swings smoothly
- A door that stays where it is left
- A clean and balanced reveal
- Proper latch alignment
- A jamb that feels secure
- Casing corners that remain closed
- A controlled transition to the wall
- Baseboards that meet the casing intentionally
- Gaps small enough for normal paint preparation
- No unnecessary destruction of the surrounding plaster
When you stand back, the opening should feel settled into the room.
When you move closer, the joints and transitions should still make sense.
That is the balance.
The mechanical part has to work.
The visible part has to respect the real house.
A Real Renovation Example
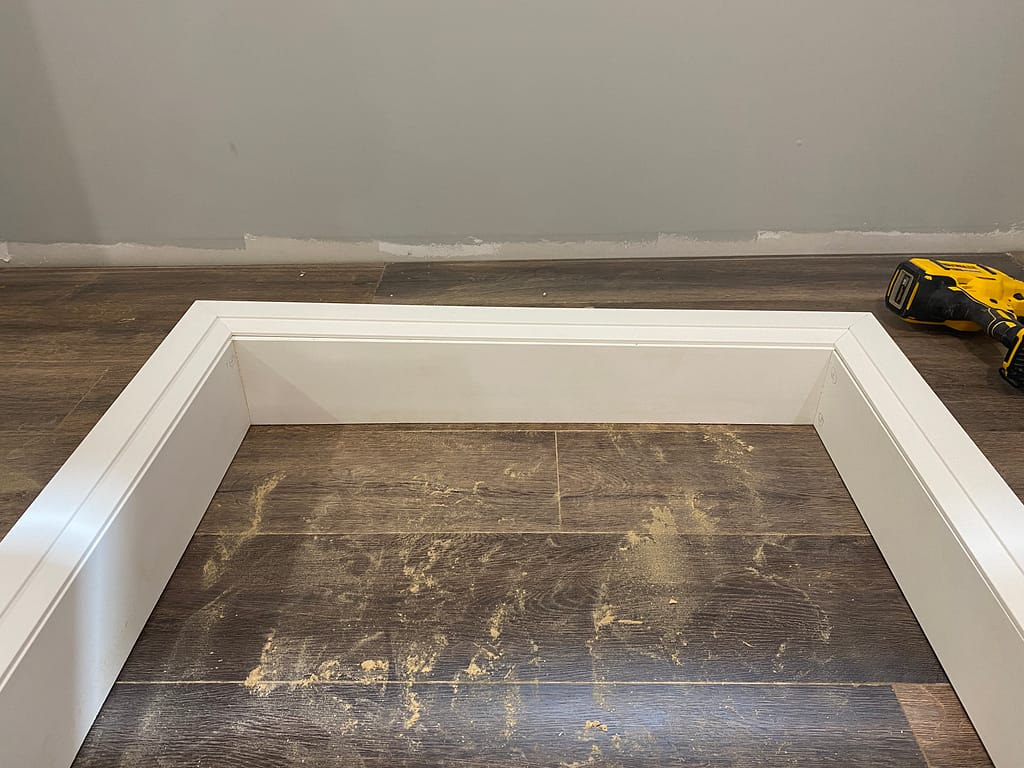
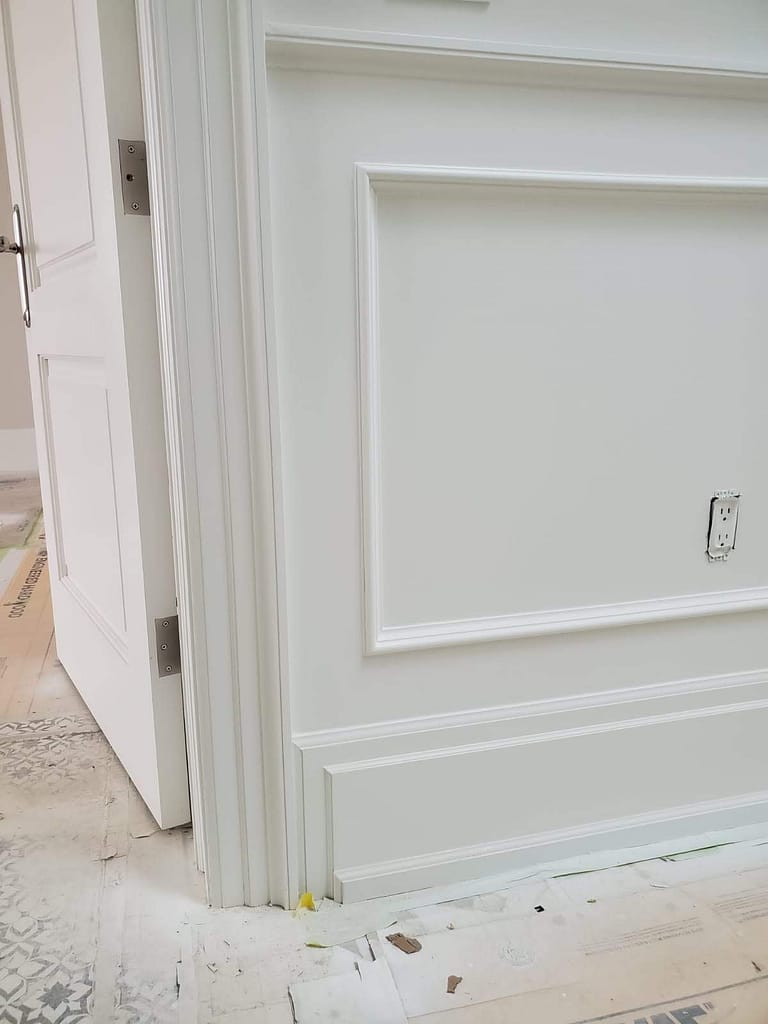
Wood Job’s Toronto bungalow renovation included solid interior doors, casing, baseboards and large custom window extensions.
The openings and trim profiles had to be treated as parts of one finish package.
The window extensions were assembled and checked before installation so their fit and alignment could be controlled before they met the finished openings. The continuous channel detail in the baseboards and casing also meant the lines had to connect cleanly around the rooms.
This is the kind of work where the widest room photograph does not tell the whole story.
The result depends on the smaller decisions: jamb depth, reveal, extension fit, casing alignment and how each profile meets the next one.
Owner-Led Door and Trim Installation
Uneven openings create decisions that cannot always be settled from the estimate or product list.
A jamb may need a small adjustment.
A casing may need to be relieved or scribed.
The wall may need preparation before the trim can continue.
An existing component may be worth preserving—or may be carrying the problem into the new work.
At Wood Job Finish Carpentry, those decisions stay close to the person responsible for the final result.
Jack Cenk Ozer personally reviews and handles the work rather than sending the details through a chain of unrelated crews.
That matters because finish carpentry is not only a sequence of cuts.
It is a sequence of judgments about the real opening.
You can read more about this approach in Why It Matters Who Actually Shows Up to Do the Finish Carpentry.
Planning Door or Trim Work Around Uneven Walls?
If your home has uneven plaster, damaged casing, out-of-plumb openings or doors that do not operate properly, send photographs before purchasing new material.
Useful photographs include:
- The complete door from both sides
- The top and side reveals
- The hinges
- The latch and strike plate
- The casing corners
- The wall beside the casing
- The baseboard-to-casing connection
- Any cracks, plaster damage or large gaps
- A level against the wall or jamb, if available
- A wider photograph showing the surrounding room
Also include:
- Project city
- Number of doors or openings
- Whether the doors are being repaired or replaced
- Whether the existing trim should remain
- Approximate wall and jamb depth
- Door style being considered
- Current renovation stage
- Flooring and painting plans
Wood Job can review the information and explain whether the project looks like a focused fitting job, a jamb and casing replacement or part of a larger finish carpentry correction.
Send the project details through the photo-based estimate page. If the wall and opening conditions cannot be understood reliably from photographs, a site walkthrough may be the better next step.
Questions About Doors and Trim on Uneven Plaster Walls
Can casing be installed over an uneven plaster wall?
Yes. Minor variations can often be handled through careful fitting, controlled caulking, relieving the back of the casing or scribing. Larger humps, hollows or damaged plaster may need wall preparation before the casing is installed.
Does the wall have to be perfectly plumb before installing a door?
No. The surrounding wall may remain out of plumb. The important point is that the jamb must be positioned so the door operates properly. The casing then creates the transition between the correctly installed jamb and the existing wall.
Should the jamb follow the wall?
Not when following the wall would pull the jamb out of alignment. The hinge jamb normally needs to be plumb, and the complete jamb must allow a clean reveal and proper latch alignment. Wall differences should be handled at the extension, casing or wall-preparation stage.
Can caulking hide the gap between casing and plaster?
Caulking can finish a small paint-grade gap. It should not be used to fill a large hollow, hold twisted casing in place or hide a jamb that does not match the wall depth.
Will a prehung door solve an uneven opening?
Not automatically. A prehung door still has to be installed into the real rough opening. Twisted studs, narrow sections, uneven flooring and inconsistent wall thickness must still be identified and handled.
Why does my door swing open by itself?
A door that moves after being released may have an out-of-plumb hinge jamb or misaligned hinge pivots. Loose hinges and other installation problems can also contribute. The opening should be checked before the slab or strike plate is altered.
Can original wood casing be reused?
Sometimes. The material has to be removed without excessive damage and still fit the new opening. Old casing that is brittle, heavily painted, cracked or cut too tightly may not be practical to reuse.
Should loose plaster be covered with wider casing?
Loose or unstable plaster should be addressed before it is covered. Wider casing can help cover old paint lines or a larger opening, but it should not be used to conceal a wall surface that cannot support the finished work.
When should a structural professional be involved?
A finish carpenter can identify an unusual condition but should not diagnose structural movement. Large new cracks, active movement, damaged headers, severe floor changes, moisture damage or visibly compromised framing may need review by the appropriate qualified professional.
Where does Wood Job install doors, casing and interior trim?
Wood Job Finish Carpentry provides owner-led door and trim installation in Oakville, Milton, Mississauga, Burlington, Cambridge, Guelph, Kitchener, Hamilton, Vaughan, Toronto and surrounding areas.
Related Wood Job Pages
Why Owner-Led Finish Carpentry Matters
Before hiring a carpenter, it helps to know who will actually show up, take responsibility and handle the details inside your home.
Meet Jack Cenk Ozer
Learn more about the hands-on finish carpenter behind Wood Job Finish Carpentry and the personal craftsmanship behind the business.
Interior Door Installation
Interior doors, door replacement, hardware, hinge alignment, latch fitting, casing and clean door installation.
Finish Trim Carpentry
Door casing, window casing, baseboards, shoe moulding, trim repairs, custom jamb details and renovation finishing.
Photo-Based Rough Estimate
Send photos, measurements, project location and a short description of your small carpentry job.




