Replacing interior doors does not automatically mean replacing every piece of trim around them.
If the existing jambs are sound and the new doors can be fitted as slabs, the casing may not need to move at all. Baseboards can often stay as well.
But “can stay” and “should stay” are not always the same answer.
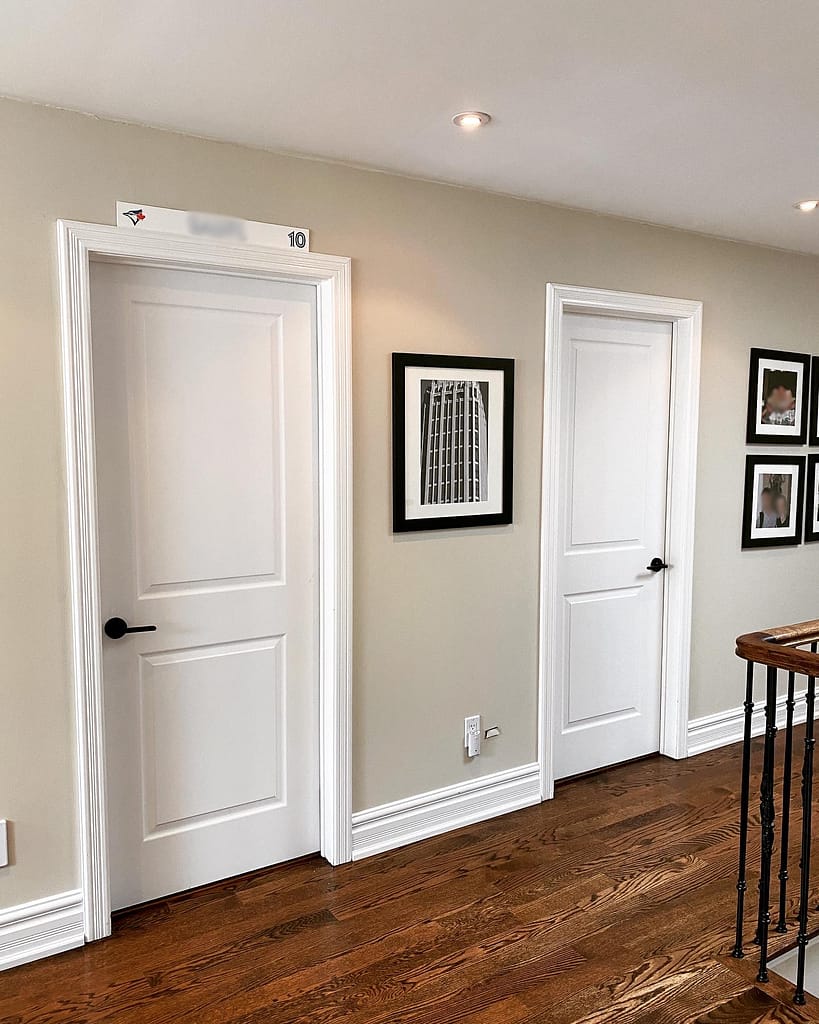
An existing casing may still be physically solid but look wrong beside the new door style. A wider replacement casing may no longer meet the old baseboard cleanly. Removing casing may expose damaged drywall or old paint lines. Replacing baseboards in only one area may create awkward transitions into adjoining rooms.
The right decision depends on three things:
- The door replacement method
- The condition of the existing trim
- The finished look you want throughout the home
The door, jamb, casing and baseboards should be evaluated together before anything is ordered or removed.
★★★★★
69 Google Reviews.
Earned One Job at a Time.
Real projects. Real homes. Real customers.
Wood Job Finish Carpentry is an owner-led finish carpentry business replacing interior doors in Oakville, Milton, Mississauga, Burlington, Cambridge, Guelph, Kitchener, Hamilton, Vaughan, Toronto and surrounding areas.
Short Answer
Existing casing and baseboards may stay if:
- Only the door slabs are being replaced
- The jambs are solid and properly installed
- The casing is in good condition
- The casing profile still suits the new doors
- The baseboards meet the casing cleanly
- The homeowner wants to limit drywall and paint repairs
- The surrounding trim will remain consistent
Replacing the casing—and sometimes the baseboards—usually makes more sense if:
- New pre-hung doors or jambs are being installed
- The existing casing is damaged, loose or heavily painted
- The new door style does not suit the old trim
- Casing widths or profiles will change
- The baseboards are already being replaced
- A full room, floor or whole-home trim update is planned
- Removing the casing leaves it unsuitable for reuse
- The goal is to reset the complete opening rather than change only the slab
Neither option is automatically correct.
The existing home and the intended finished result decide the scope.
A Slab Door Replacement Can Leave the Casing in Place
A slab door is the door itself without a new jamb or casing.
If the existing jamb is straight, secure and in good condition, a new slab can sometimes be fitted into it. The hinge locations are mortised into the new door, the hardware is prepared, and the slab is trimmed or adjusted to suit the existing opening.
In that situation, the casing may never need to be disturbed.
This can be a sensible choice when:
- The existing trim is still attractive
- The homeowner is happy with its size and profile
- The casing joints remain tight
- The jamb-to-casing reveal is consistent
- There is no reason to open the wall around the door
- The new door complements the existing trim
Keeping the casing reduces demolition. It can also reduce drywall damage, caulking, filling and repainting around every opening.
The important condition is that the existing jamb must be suitable for the new door. A new slab will not correct a twisted frame, weak hinge fastening or an opening that has never worked properly.
My guide to replacing interior doors without replacing the frame explains the jamb, hinge, latch and reveal conditions that should be checked before choosing this route.
Pre-Hung Doors Require the Casing to Come Off
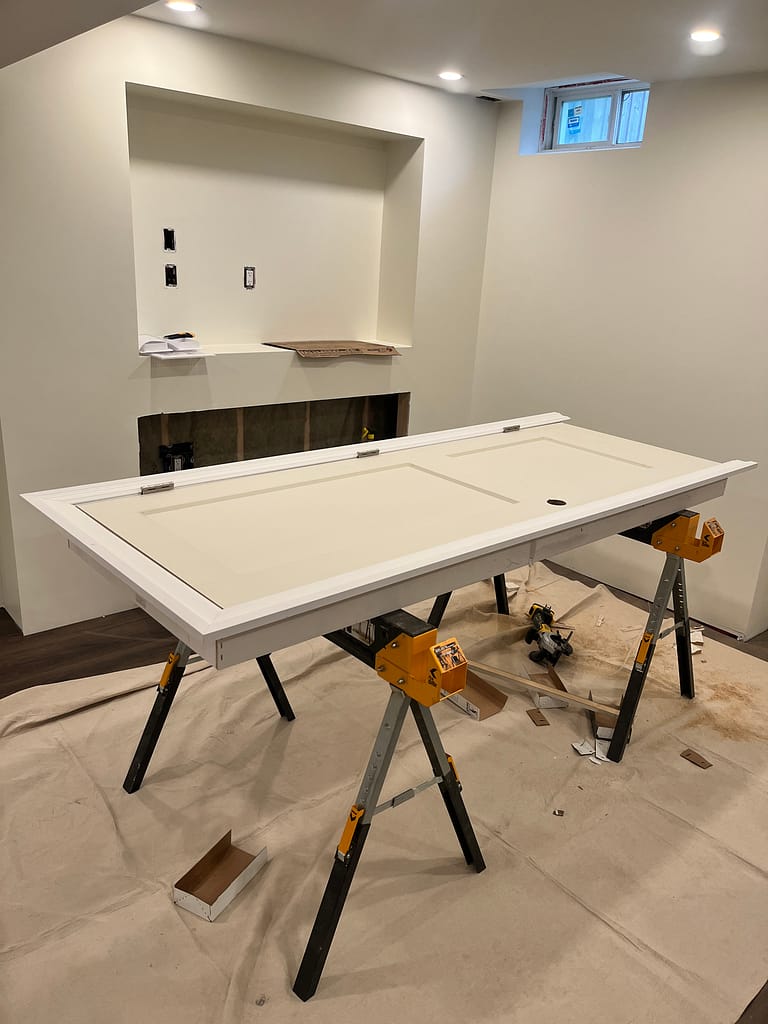
A pre-hung door comes mounted in a new jamb.
To remove the old jamb and set the new unit inside the rough opening, the casing normally has to be removed from both sides of the doorway. The casing covers the gap between the jamb and drywall, so it sits directly over the area the carpenter needs to access for shimming and fastening.
Existing casing can sometimes be carefully removed and reused. Whether that is worthwhile depends on:
- How it was originally fastened
- The material
- Its age and condition
- The amount of paint and caulking around it
- Whether the mitres remain intact
- Whether the new jamb dimensions suit the old casing
- How much damage occurs during removal
MDF casing, in particular, may not come away cleanly if it has been heavily nailed, caulked and painted. Edges can break, the back surface can tear, and the mitres may no longer close as they did before removal.
Real wood casing can sometimes be more forgiving, but reuse still requires careful removal and preparation.
If new casing is already part of the plan, a pre-hung installation provides an opportunity to reset the jamb, reveal and trim as one complete opening. Homeowners comparing these two replacement methods can read Slab Door vs Pre-Hung Door for Interior Door Replacement.
The Existing Casing May Be Sound but Wrong for the New Door
Physical condition is only half the decision.
A casing can be solid, securely installed and completely reusable while still feeling visually disconnected from the new door.
Door and trim styles have a language.
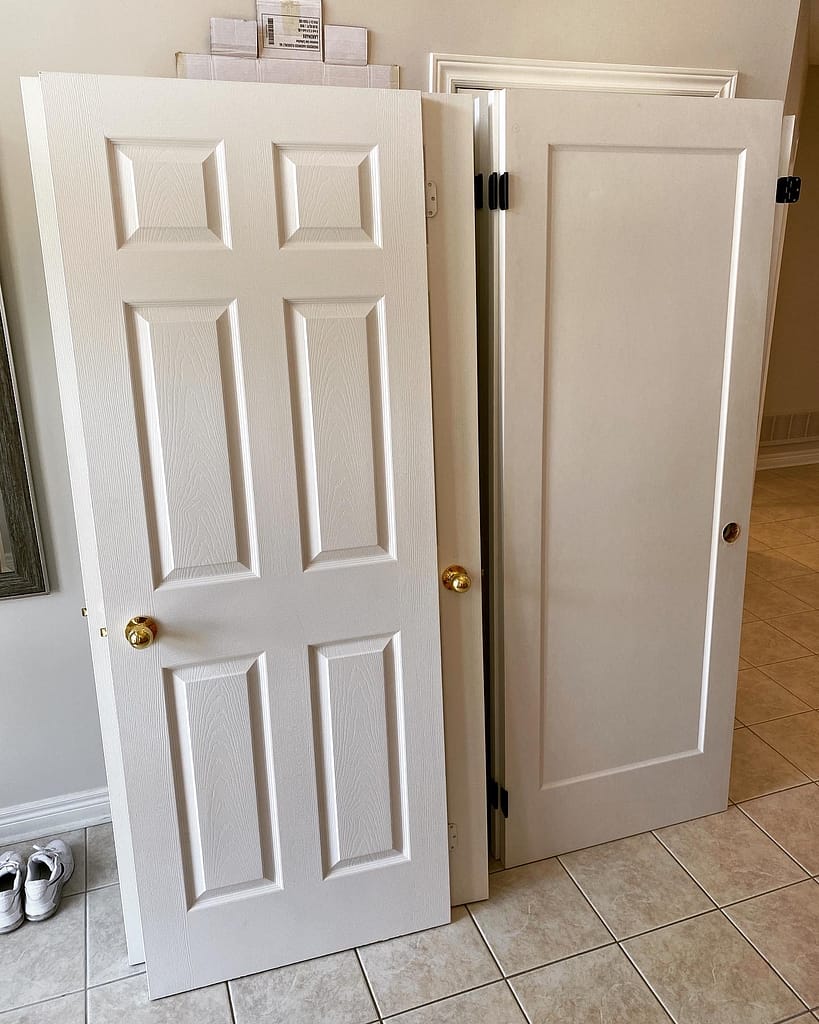
Traditional six-panel doors commonly appear with colonial-style casing and baseboards. Those profiles usually contain rounded edges, curves or more decorative movement. The door panels and surrounding trim belong to a similar traditional family.
A one-panel Shaker door is different. Its design is built from straight rails, stiles and a simple recessed panel. There is very little decorative movement.
Keeping a strongly curved colonial casing around a clean one-panel Shaker door is possible, but it may make the opening feel like two different renovations joined together.
This does not mean every Shaker door requires perfectly flat trim. A restrained bevel, step or simple profile can work very well. The point is to consider the door and trim together before deciding that the existing casing should stay merely because it is undamaged.
Nicholle’s Oakville Project: When Replacing Everything Made Sense
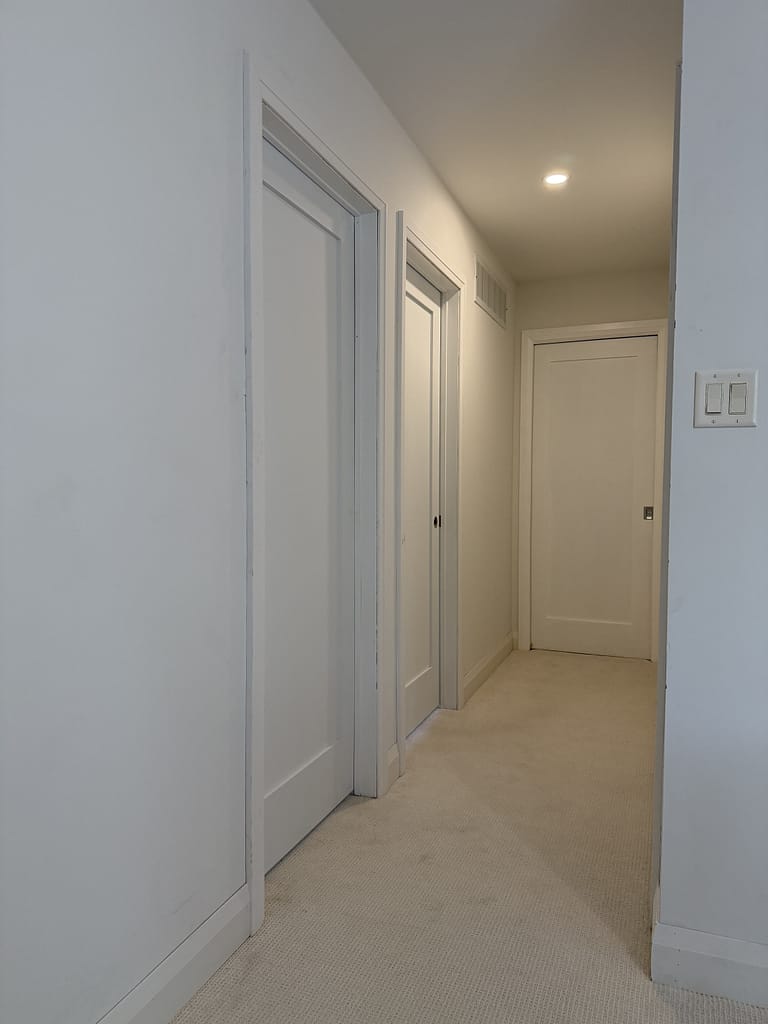
A real example is Nicholle’s interior door and trim replacement in Oakville.
The home originally had traditional six-panel hollow-core doors with colonial-style casing and baseboards. That combination made sense as one system. The door panels and trim profiles both carried a more traditional design language.
Nicholle chose to replace the old doors with one-panel solid-core Shaker doors.
The casing and baseboards were also changed to modern step-bevel profiles. That decision was not based only on the condition of the old trim. It was about making the complete interior agree with the new door style.
The old colonial trim had curves and rounded profile details. The new Shaker doors had clean, straight lines. Step-bevel casing and baseboards created a quieter transition around the openings and continued that cleaner geometry along the walls.
In this case, keeping the old casing and baseboards might have reduced the amount of work. It would not have delivered the same finished result.
The project is a useful reminder:
Reusable trim is not always the right trim for the new design.
Baseboards Can Usually Stay—Until the Casing Changes
Replacing a door slab does not normally require baseboard removal.
Even replacing the jamb and casing does not automatically mean the baseboards throughout the room must come off. The existing baseboard may be left in place while the casing beside it is replaced.
The difficulty is at the joint where the baseboard ends against the casing.
If the new casing has the same width and thickness as the old casing, the existing baseboard may reconnect cleanly. If the casing changes, several issues can appear.
A narrower casing can leave a gap
If the new casing is narrower than the old one, the existing baseboard may stop short. The old paint and caulking line may also remain visible on the wall.
A short baseboard patch can sometimes close the gap, but the repair must match the existing profile and thickness. On a prominent wall, replacing the full run may look cleaner than inserting a very small piece.
A wider casing may require the baseboard to be shortened
If the new casing is wider, it may overlap the end of the existing baseboard. The baseboard then needs to be cut back without damaging the surrounding wall, flooring or finished surface.
This can work, but the casing and baseboard profiles still need to meet properly.
Different thicknesses can create an awkward step
Casing generally needs enough projection from the wall to receive the end of the baseboard cleanly.
If the baseboard is thicker than the new casing, it may project beyond the casing face. The exposed edge can make the transition look like an afterthought.
A plinth block, backband or another intentional detail may solve certain designs, but this should be planned before the trim is purchased.
For a closer look at these relationships, see Why Baseboard and Door Casing Should Be Chosen Together.
Sometimes Only the Casing Should Be Replaced
There are projects where the doors and casing should change but the baseboards are worth keeping.
This can make sense when:
- The baseboards are already a suitable height and profile
- They are in good condition throughout the home
- Removing them would cause unnecessary wall repairs
- Matching replacement material is available
- The new casing can meet them cleanly
- The baseboard remains appropriate for the new door style
The key is to test the actual profiles together.
A short casing sample should be placed against the existing baseboard at a doorway. Look at the joint from the front and the side. Confirm the width, thickness and profile relationship before ordering casing for the entire home.
A profile that looks suitable in a showroom may behave differently where it physically meets the existing baseboard.
Sometimes the Complete Trim Package Should Be Replaced
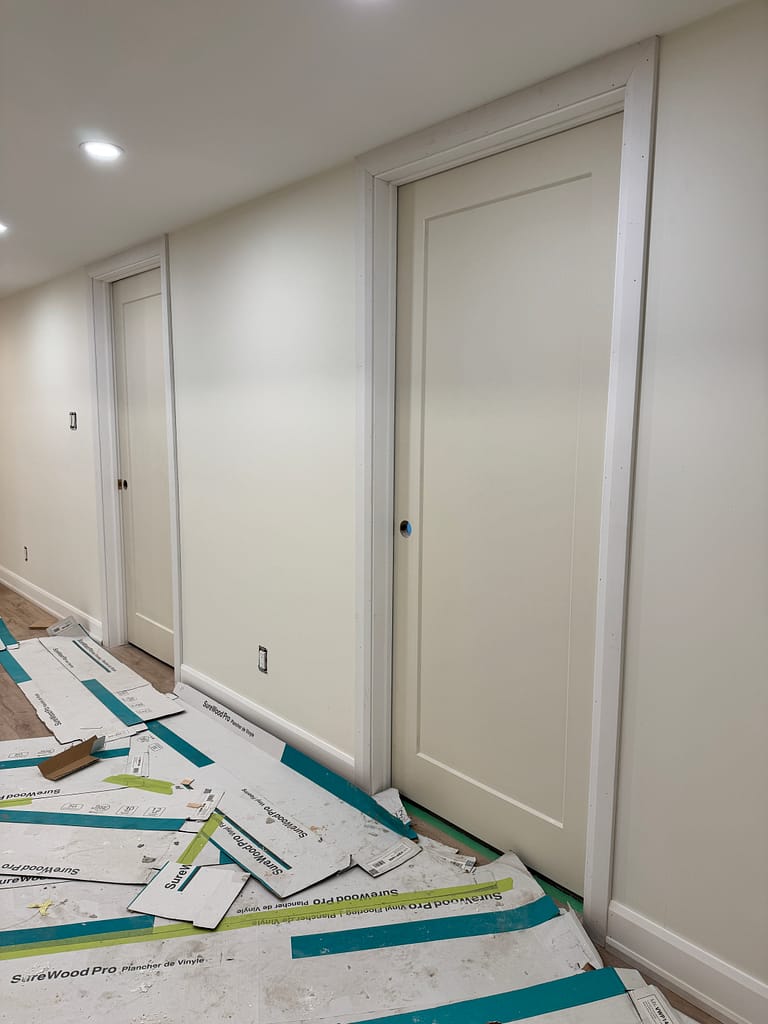
Replacing casing and baseboards together gives the most freedom to create a consistent new trim package.
This route may be appropriate when:
- The doors are changing to a very different style
- Existing trim is narrow, damaged or inconsistent
- Flooring is being replaced
- Several rooms or an entire floor are being renovated
- Window casing also needs updating
- Different additions or repairs have left mismatched profiles
- The homeowner wants consistent casing and baseboard transitions
- Removing the old trim will already require wall preparation and painting
A complete replacement allows the casing width, baseboard height, material, thickness and profiles to be chosen as one system.
It also avoids piecing new casing into baseboards that were cut for a different profile.
That does not mean every door replacement should grow into a whole-home trim renovation. If good trim already exists and fits the design, removing it adds cost, disruption and finishing work without necessarily improving the result.
The scope should solve a real problem.
What Happens to the Walls When Casing Is Removed?
Old casing rarely comes off without leaving some evidence behind.
The carpenter may find:
- Caulking lines
- Layers of paint
- Torn drywall paper
- Broken plaster edges
- Nail holes
- Old adhesive
- Uneven drywall
- Gaps that were hidden by the original casing
- A jamb that sits behind or projects beyond the wall surface
Wider replacement casing may cover much of the old footprint. Narrower casing may expose it.
This is one reason casing width should not be selected from a sample alone. The new profile must work with both the opening and the area left behind by the old trim.
Wall preparation may involve patching, sanding, priming, caulking and painting. Those tasks should be included in the project plan even when the carpentry scope and painting scope are handled separately.
The answer to “Can the casing be removed?” is almost always yes.
The better question is:
What will the wall need after it is removed?
Heavily Painted Trim Is Usually Harder to Save
Several coats of paint can join the casing to the wall, jamb and adjoining baseboard.
Removing it without first cutting the caulking and paint lines may tear the drywall paper or pull paint away from the wall. Even with careful removal, old MDF can split around fasteners or lose material from its back surface.
Paint buildup can also soften the original profile and fill the joints. Reinstalling the same pieces beside a clean new door may preserve a trim package that already looks tired.
If the existing casing has a distinctive profile that is worth keeping, careful removal may still be justified. But the labour required to remove, label, clean, repair and reinstall old trim should be compared honestly with installing new material.
Reusing something is not automatically the less expensive option.
Should Baseboards Stay If New Flooring Is Planned?
Flooring changes the answer.
If new flooring will be installed soon, the door and trim decision should be coordinated with that work. Flooring thickness can affect:
- Door bottom clearance
- Jamb height
- Casing length
- Baseboard height
- Shoe moulding
- Transitions between rooms
Removing baseboards before new flooring can allow the flooring edge to be covered by the reinstalled or replacement baseboard. In other situations, existing baseboards remain and shoe moulding is added after the flooring.
Both methods can work, but they do not create exactly the same appearance.
If new doors are installed before the final flooring height is known, the door bottoms or jamb legs may later need additional adjustment. Planning the sequence early prevents one finished trade from being cut apart for the next.
The home renovation order guide explains how flooring, doors, casing, baseboards, shoe moulding and painting affect one another.
Partial Replacement Needs a Clear Stopping Point
Replacing the trim in one room, one hallway or one floor can work well if the transition into the existing home is planned.
Natural stopping points may include:
- A doorway
- A stair landing
- The beginning of a hallway
- A change in flooring
- A cased opening
- A separate basement level
Problems begin when a new baseboard stops in the middle of a visible wall or two noticeably different profiles meet without an intentional transition.
Before removal begins, decide:
- Which doors are being replaced
- Which jambs will remain
- Which casing will be changed
- Whether window casing is part of the same room
- Where new baseboard will stop
- How the new trim will meet the existing trim
- Which walls will require repainting
A smaller scope can still look complete. It simply needs a logical boundary.
What I Check Before Recommending That the Trim Stay
Before suggesting that existing casing and baseboards remain, I look at more than whether they are still attached.
The main checks include:
- The condition of the jamb
- Whether the old door currently swings and latches properly
- Hinge condition and fastening
- Casing material and profile
- Casing mitres and reveal lines
- Paint and caulking buildup
- Damage near the bottoms of the casing
- How the baseboard meets the casing
- Whether the new door style suits the existing trim
- Flooring plans
- Wall condition around the opening
- Consistency with adjoining rooms
- The intended paint stage
- Whether the homeowner wants a limited door upgrade or a complete visual change
Sometimes the answer is clear from good photographs. Other openings need to be seen in person because the jamb, wall and casing do not sit on the same plane.
A Practical Decision Guide
Keep the casing and baseboards
This is usually the best starting point when the jambs are good, slab doors are being fitted, the trim is still appropriate and the homeowner wants a focused door replacement.
Keep the baseboards but replace the casing
Consider this when the jamb or casing needs to change but the existing baseboards remain suitable. Confirm the casing width, thickness and joint before ordering material.
Replace the doors, casing and baseboards
This often makes sense when the door style is changing substantially, the existing trim is dated or damaged, flooring is being replaced, or the renovation is intended to create a consistent new interior.
Inspect before deciding
Choose this option when the doors have never worked properly, the casing is heavily painted, the walls are uneven, the jamb condition is unclear or several generations of trim meet in the same area.
A site condition should not be forced into a predetermined package.
The Best Choice Is the One That Looks Intentional
Keeping existing casing and baseboards can be practical, less invasive and completely appropriate.
Replacing them can give the new doors the visual support they need and allow the complete opening to be corrected at the same time.
The decision should not be driven by a rule that all trim must stay or all trim must go.
If the existing casing is solid, clean and well matched to the new doors, keeping it may be the most sensible choice. If traditional six-panel doors are being replaced by one-panel Shaker doors and the old colonial trim no longer belongs with them, a full door-and-trim update may produce a much more coherent result.
A door is used as a door.
But it is seen as part of the wall, casing and baseboard around it.
That complete picture should decide the scope.
Planning an Interior Door and Trim Replacement?
Send clear photos showing both sides of the doors, the jambs, hinges, casing and the point where the baseboards meet the casing.
Also include:
- Project city
- Number of doors
- Door sizes, if available
- Slab or pre-hung preference, if known
- Hollow-core or solid-core preference
- Photos of the existing trim profiles
- Whether flooring will also be replaced
- Whether the home is occupied or under renovation
- Whether the materials have already been purchased
- A short explanation of what you want to keep or change
Wood Job can review the information and explain whether a focused slab replacement, new casing or a more complete door-and-trim package appears to be the sensible starting point.
You can send the details through the photo-based estimate page.
For the main service overview, see Interior Door Installation and Replacement and Baseboard Installation, Casing and Interior Trim.
Interior Door, Casing and Baseboard Questions
Do I have to replace the casing when replacing interior doors?
No. If only the door slabs are being replaced and the existing jambs and casing are in good condition, the casing can often remain. A pre-hung door installation normally requires the casing to be removed so the old jamb can come out and the new jamb can be set properly.
Can old door casing be removed and reused?
Sometimes. Real wood casing in good condition may be reusable if it can be removed without splitting or damaging the mitres. MDF casing, heavily nailed trim and casing covered by several layers of paint and caulking can be harder to save cleanly.
Do baseboards have to be removed for new interior doors?
Usually not. A slab door replacement normally has no effect on the baseboards. If the casing width or thickness changes, however, the existing baseboard may need to be shortened, extended, patched or replaced where it meets the doorway.
Can I keep colonial casing with Shaker doors?
Yes, technically, if the casing is in good condition and you like the combination. However, strongly curved colonial profiles may feel visually disconnected from the straight, restrained design of a Shaker door. Flat, bevelled or lightly stepped profiles often create a more consistent relationship.
Is replacing all the trim more expensive than keeping it?
Usually, because it adds material, removal, installation and wall-finishing work. However, carefully removing, repairing and reinstalling old trim also requires labour. The condition and value of the existing trim should be considered before assuming reuse will be cheaper.
Should casing and baseboards be replaced at the same time?
Not necessarily. Existing baseboards can remain if the new casing meets them cleanly in width, thickness and profile. If both profiles are changing or the room is receiving a complete trim update, replacing them together makes it easier to create consistent transitions.
Will wider casing cover damage left by the old casing?
It may cover the old paint and caulking footprint, but width should not be chosen for that reason alone. Wider casing must also fit beside walls, switches, cabinets, ceilings and nearby openings. Drywall repair may still be needed.
Should doors or flooring be replaced first?
The final flooring height needs to be known before door clearances, jamb lengths and casing details are finalized. The best sequence depends on the flooring type and whether baseboards will be removed, but the door and flooring plans should be coordinated before installation begins.