One of the most common questions homeowners ask after new trim has been installed is:
“Who fills the nail holes, applies the caulking and paints everything?”
It’s a fair question, especially if you’ve never been through a finish carpentry project before.
The short answer is that finish carpenters and painters usually have different responsibilities, and understanding where one trade ends and the other begins helps avoid confusion before the project starts.
At Wood Job Finish Carpentry, I believe homeowners should know exactly what to expect. A properly installed trim package isn’t simply “finished” because it’s nailed to the wall. At the same time, caulking and paint should never be expected to correct poor carpentry.
Knowing the difference makes it much easier to evaluate the quality of the work.

★★★★★
69 Google Reviews.
Earned One Job at a Time.
Real projects. Real homes. Real customers.
Wood Job Finish Carpentry is trusted by homeowners, contractors, designers, and realtors who care about clean work, careful details, direct communication and finish carpentry that is handled with personal responsibility.
What a Finish Carpenter Should Deliver
A finish carpenter’s responsibility is to install trim that fits properly before any paint preparation begins.
That means creating tight joints, consistent reveals, clean miters and smooth transitions throughout the installation.
Paint, filler and caulking should enhance good workmanship—not hide poor workmanship.
When I finish installing trim, my goal is for every joint to fit as well as possible on its own.
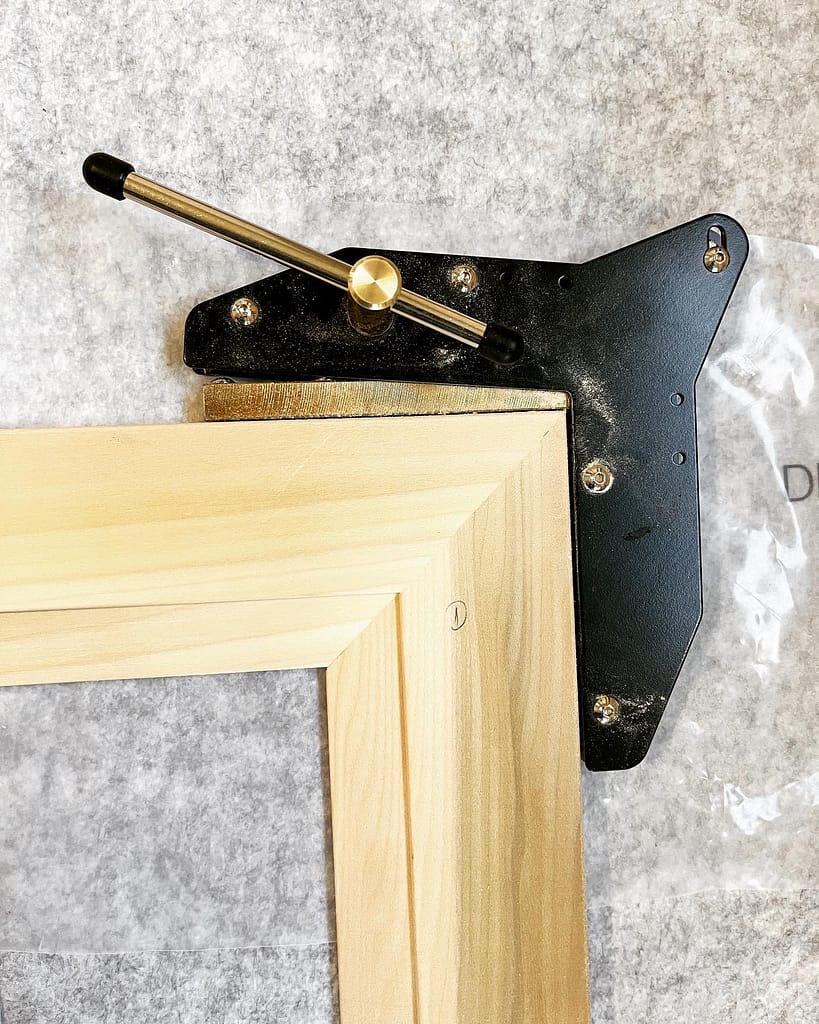
Miter Joints Should Fit Before Caulking
Miter joints are often the first place homeowners notice.
Door casing.
Window casing.
Baseboards.
Crown moulding.
Every corner should close tightly.
A finish carpenter shouldn’t rely on caulking to pull an open miter together.
Sometimes older homes present challenges. Walls may not be perfectly square, ceilings may have shifted slightly over time or framing may not be perfectly aligned. In those situations, an experienced finish carpenter adjusts the cutting angles until the joint fits as closely as possible.
If an extremely small hairline gap remains because of natural material movement or the conditions of the home, it’s typically addressed during the painting preparation stage. The important point is that the joint itself should already fit properly before any filler or caulking is applied.
The filler is there to refine good work—not replace it.
Long Trim Joints Matter Too
Corners aren’t the only places that deserve attention.
Long runs of baseboard, crown moulding or shoe moulding often require two pieces to be joined together.
These joints should also be carefully planned.
Whenever possible, they should be positioned where they’re less noticeable and cut in a way that produces a smooth transition between the two pieces.
A well-made joint should look intentional before the painter ever opens a tube of caulking.
Proper Installation Comes Before Cosmetic Finishing
A quality trim installation is about much more than filling holes later.
Before the painter arrives, the trim should already be:
- Securely fastened
- Properly aligned
- Free of movement
- Installed with clean, tight joints
- Consistent from room to room
Those details are what determine whether the finished project looks professional years later.
What Is Normally the Painter’s Responsibility?
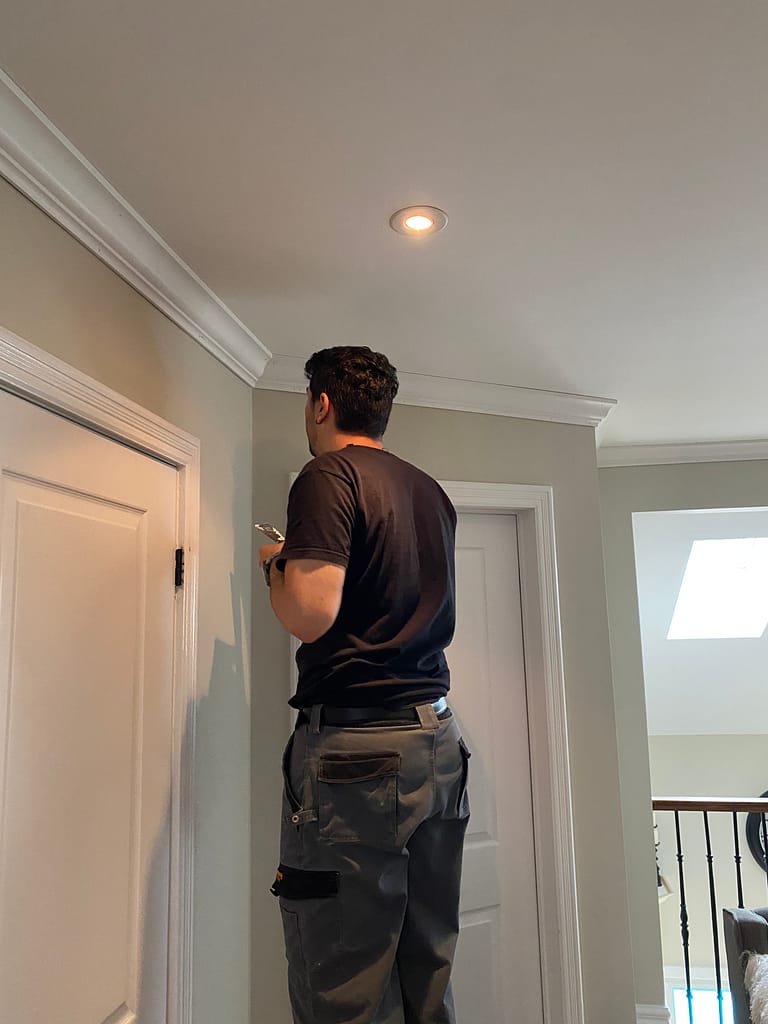
Once the trim has been properly installed, the painter usually takes over the final finishing process.
This stage prepares the trim for primer and paint while creating the seamless appearance most homeowners expect.
Typical painting preparation includes:
- Filling finish nail holes
- Applying paintable caulking where trim meets drywall
- Filling small surface imperfections
- Light sanding where needed
- Priming
- Applying the final coats of paint
- Final touch-ups after everything has cured
This sequence allows the entire room to be prepared consistently before the final paint finish is applied.
Why Doesn’t the Carpenter Caulk Along the Wall?
This is another question I hear regularly.
If the carpenter installed the trim, why not simply apply the caulking before leaving?
The answer comes down to how painting projects are completed.
Painters don’t simply paint the trim. They prepare the entire surface around it.
As they inspect the walls, they often identify small drywall imperfections, previous paint buildup, tiny cracks or areas that need additional preparation. Applying the trim caulking at the same stage allows them to create one continuous, consistent finish before priming and painting.
If the carpenter applies the caulking first, it’s common for the painter to go over much of it again anyway as part of their normal preparation process.
That’s why, on most residential projects, the trim-to-wall caulking is considered part of the painting process rather than the finish carpentry installation.
Can Homeowners Fill Nail Holes Themselves?
Absolutely.
For small projects or minor touch-ups, many homeowners choose to fill nail holes and apply caulking themselves before painting.
The key is understanding that these products are meant to prepare an already well-installed trim package, not compensate for poor installation.
Small finish nail holes can usually be filled in just a few minutes. Once the filler dries, a light sanding is often all that’s needed before priming and painting.
Caulking follows the same principle.
Its job is to create a clean transition where the trim meets the drywall, not to hide large gaps or poorly fitted joints.
If you’re planning to do this part of the work yourself, taking your time will usually produce much better results than trying to rush through the preparation.
A Good Paint Job Cannot Fix Poor Finish Carpentry
Caulk should hide tiny seasonal movement — not poor workmanship.
A quality paint job can make good finish carpentry look even better, but it shouldn’t be expected to correct poorly fitted miter joints, uneven trim or careless installation.
The carpenter’s job is to create clean, accurate joinery first. Paint preparation simply completes the finish.
Products I Personally Recommend
If a homeowner asks what products I personally like to use or recommend for small touch-ups, these are a few that I’ve had consistently good results with over the years.
There are certainly other quality products available, but these are ones I feel comfortable recommending based on my own experience.
Dynamic DynaPatch Pro
Excellent for filling finish nail holes because it sands easily and has very little shrinkage.
Amazon:
https://amzn.to/4fGT3js
FAMOWOOD Latex Wood Filler
A good choice for repairing slightly larger imperfections or small damaged areas in wood trim before painting.
Amazon:
https://amzn.to/4gRLloL
DAP Dynaflex 230
A flexible, paintable caulk that performs well where trim meets drywall and allows for normal seasonal movement.
Amazon:
https://amzn.to/44Op8Rb
Red Devil Flexible Putty Knife
A flexible putty knife helps spread filler smoothly while reducing the chance of damaging surrounding trim.
Amazon:
https://amzn.to/4bdiszF
Assorted Sanding Sponges
Flexible sanding sponges work well for smoothing filled nail holes and preparing trim before primer and paint.
Amazon:
https://amzn.to/3TCL0wp
Frequently Asked Questions
Does every trim joint need caulking?
No. Proper trim joints should fit tightly on their own. Caulking is generally used where trim meets drywall, not to hide poorly fitted miter joints or long trim joints.
Who normally fills finish nail holes?
On most residential projects, this is typically done by the painter as part of the surface preparation before priming and painting. However, if you’re painting the trim yourself, filling the nail holes is a straightforward DIY task.
Should a finish carpenter caulk around door casing and baseboards?
That depends on the scope of work, but on projects where a painter is following behind, trim-to-wall caulking is normally completed during the painting stage.
Can caulking fix open miter joints?
No. If a miter joint is visibly open, the first solution should be improving the fit of the joint—not adding more caulking. Caulk is designed to finish quality workmanship, not replace it.
Can I paint new trim without filling the nail holes?
You can, but the nail holes will almost always remain visible after painting. Filling, sanding and proper surface preparation produce a much cleaner finished appearance.
Final Thoughts
Understanding who is responsible for each stage of a finish carpentry project helps everyone involved.
The finish carpenter focuses on accurate installation, clean joinery and proper fit.
The painter prepares those surfaces for their final appearance through filling, caulking, priming and painting.
When each trade performs its own work to a high standard, the finished room looks seamless—and that’s exactly how it should be.
If you’re planning new interior doors, baseboards, window casing or other finish carpentry and you’re unsure what should be included before painting begins, I’m always happy to explain the process before the work starts.
You can also learn more about my approach on the Finish Trim Carpentry page:
Or, if you’re planning to replace your interior doors at the same time, you may find these guides helpful:
Interior Door Installation
How Much Can You Trim or Resize an Interior Door?