
Door and window casing commonly ranges from approximately 2¼ inches to 3½ inches in residential interiors.
That gives homeowners a starting point.
It does not give every home the same answer.
A 2¼-inch casing may look appropriate around a standard bedroom door in a simple builder-grade interior. A 3½-inch flat casing may better suit an eight-foot solid-core door, taller baseboards and a more modern trim package.
But the widest casing that suits the main hallway may not fit above a basement door. A decorative profile that looks clean on a straight wall may become distorted when it has to be narrowed beside a corner or tapered below uneven ductwork.
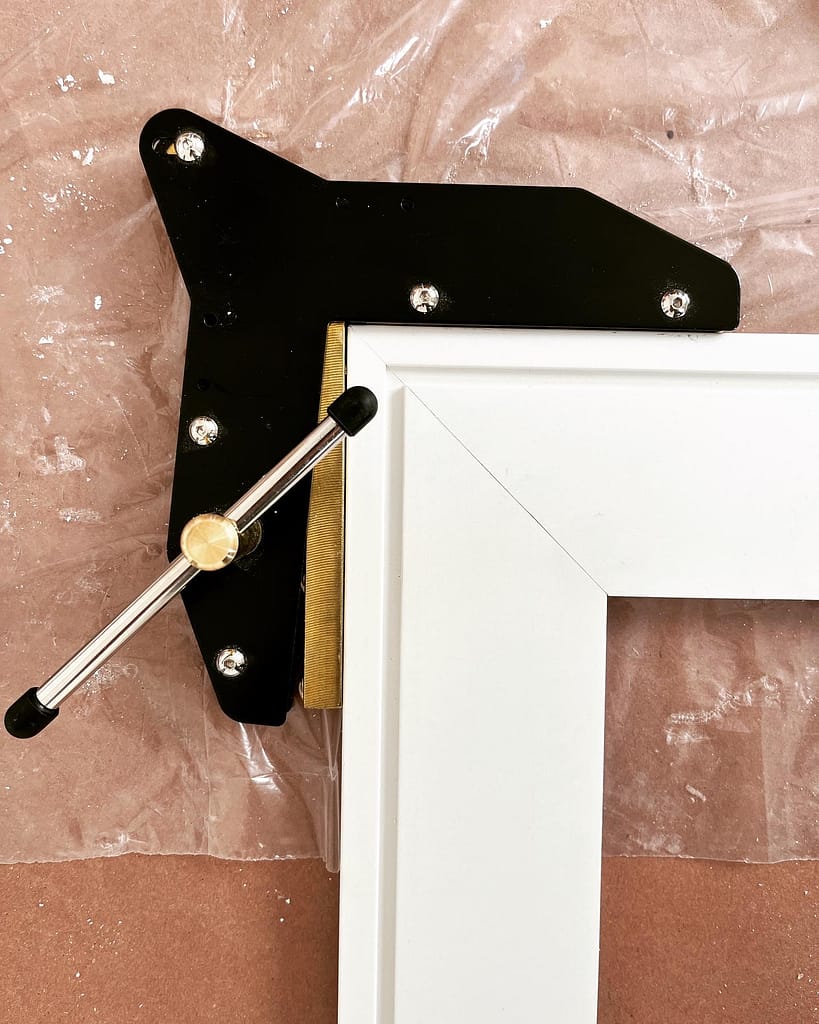
The right casing width depends on:
- Door and window size
- Ceiling height
- Baseboard height and thickness
- Available wall space
- Distance from the opening to nearby corners
- Casing profile and style
- Jamb and drywall conditions
- Window depth
- Basement ceilings, bulkheads and ductwork
- Whether one profile can be used consistently throughout the project
Width matters.
The shape of the profile matters just as much.
For homeowners planning a larger trim project, Wood Job explains the complete service here: baseboard installation, casing and interior trim.
★★★★★
77 Google Reviews.
Earned One Job at a Time.
Real projects. Real homes. Real customers.
Wood Job Finish Carpentry is an owner-led finish carpentry business serving in Oakville, Milton, Mississauga, Burlington, Cambridge, Guelph, Kitchener, Hamilton, Vaughan, Toronto and surrounding areas.
The Practical Answer: Common Interior Casing Widths
There is no single required casing width for every residential opening.
These are practical starting points rather than fixed design rules.
2¼-Inch Casing
A 2¼-inch casing is one of the most common traditional residential sizes.
It is frequently found in:
- Builder-grade homes
- Older standard trim packages
- Bedrooms and smaller rooms
- Homes with modest baseboards
- Openings with limited wall space
- Basement doors with tight clearances
This width is easy to source and relatively easy to fit around crowded openings.
Its weakness is scale.
Around tall doors, wide hallways or larger modern rooms, 2¼-inch casing can sometimes look light or undersized. This becomes more noticeable when it is paired with tall baseboards or heavy solid-core doors.
2½- to 2¾-Inch Casing
This range provides a modest visual step up without occupying as much wall space as a 3½-inch profile.
It can work well for:
- Standard eight-foot ceilings
- Regular 80-inch interior doors
- Transitional trim packages
- Renovations where wall space is somewhat limited
- Homeowners who want more presence without a very wide casing
It is often a useful middle ground, especially when replacing narrow builder-grade casing without redesigning the entire trim package.
3¼- to 3½-Inch Casing
A 3¼- or 3½-inch casing has more visual weight.
It is commonly used with:
- Modern flat-stock trim
- Craftsman-inspired interiors
- Taller baseboards
- Eight-foot doors
- Nine-foot or higher ceilings
- Large window openings
- Full-home trim replacements
- More substantial solid-core doors
This size can create a clean and intentional frame around doors and windows.
It also requires more room.
Before choosing it for an entire home, every door and window should be checked—not only the most open and symmetrical ones.
Casing Wider Than 3½ Inches
Four-inch and wider casing can suit tall openings, large rooms, traditional built-up trim packages or intentional Craftsman-style details.
At that scale, the trim may involve:
- Flat stock
- Backband
- Wider head casing
- Architrave details
- Plinth blocks
- Multi-piece assemblies
- Custom header designs
Wider casing should look intentional. It should not feel like a large board was installed simply because the room had enough space.
It also needs to work around every nearby corner, switch, cabinet, window and ceiling condition.
Casing Width and Casing Profile Are Not the Same Decision
Two casings can both be 3½ inches wide and behave very differently.
One may be a simple flat board with a lightly eased edge.
The other may contain:
- Several steps
- Deep curves
- Beads
- Ogee details
- Fluting
- A raised centre
- A narrow decorative edge
Those profiles create light and shadow across the face of the casing.
That can look very good when the material remains full width.
It can look very bad when the casing has to be narrowed.
A flat 3½-inch casing can sometimes be reduced slightly and still read as a simple flat board. A decorative 3½-inch casing may lose an entire step or curve when it is ripped narrower.
The result can become visibly unbalanced:
- One side retains the complete profile
- The other side loses part of the detail
- The decorative centre no longer appears centred
- Mitres stop lining up naturally
- The changing profile makes an uneven ceiling more noticeable
This is why casing should never be selected from a small front-facing sample alone.
Look at the complete profile.
Then ask what will happen if one piece has to become narrower than the others.
Match the Casing to the Door, Not Only the Ceiling Height
Door size affects how casing feels around the opening.
A standard 80-inch hollow-core door does not have the same visual weight as a 96-inch solid-core door.
Wider casing can help frame:
- Tall interior doors
- Heavy solid-core doors
- Wide double doors
- French doors
- Large cased openings
- Openings with transoms or sidelights
Narrow casing can appear weak beside a very tall or heavy door.
The opposite can also happen. Wide decorative casing around a small storage door or narrow basement opening can overwhelm the door and make the proportions feel forced.
The casing should support the opening.
It should not compete with it.
Homeowners replacing doors and trim together should consider the complete opening rather than choosing the door slab first and treating the casing as an afterthought. Wood Job’s interior door installation and replacement service explains how doors, jambs, casing, hardware and real opening conditions work together.
How Casing Should Relate to Baseboards
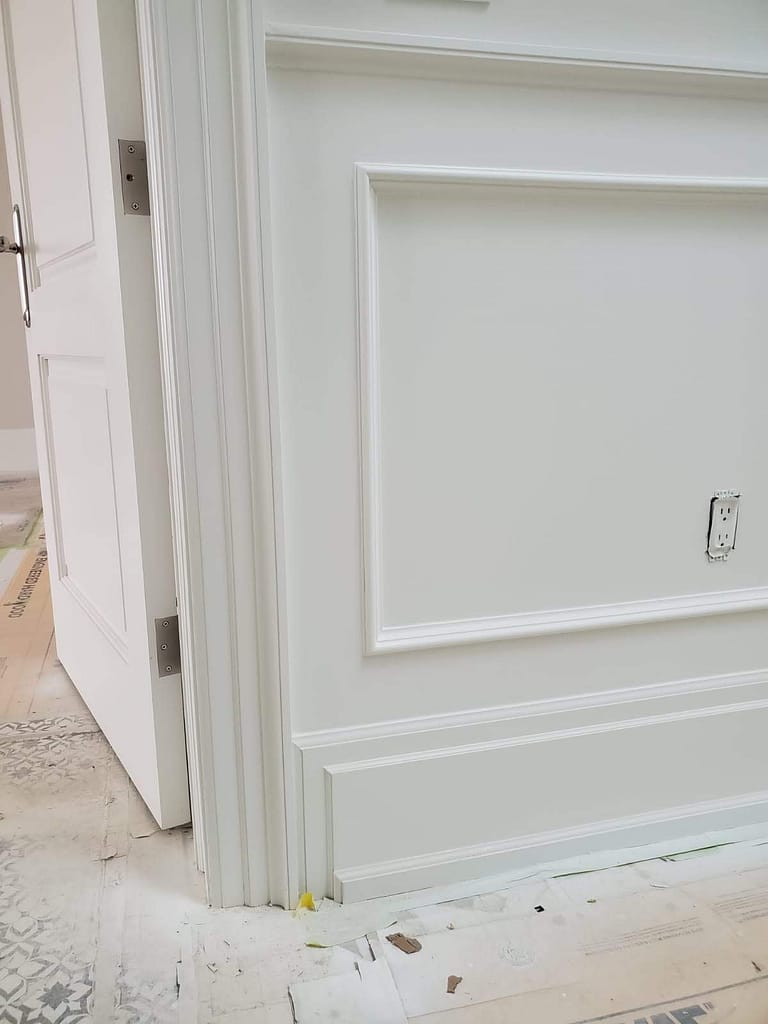
Casing and baseboards do not have to share the same face dimension.
A 5¼-inch baseboard can work with 2¾-inch casing. A 7¼-inch baseboard may work well with 3½-inch casing.
The relationship is visual, not mathematical.
The two pieces should feel as though they belong to the same trim package.
Look at:
- Profile style
- Edge details
- Material
- Paint finish
- Overall scale
- Thickness
- How the baseboard terminates against the casing
Thickness is especially important.
At the bottom of a door opening, the baseboard meets the side casing. The casing should generally project far enough from the wall to receive that baseboard cleanly.
If the baseboard is thicker than the casing, it may sit proud and create an awkward exposed edge.
Possible solutions include:
- Selecting a thicker casing
- Adding backband
- Using a plinth block
- Creating a controlled return
- Choosing compatible baseboard and casing profiles from the beginning
This joint is small, but it appears at almost every doorway in the home.
A trim package can look good in a showroom sample and still fail at the floor if the material thicknesses were not compared.
Check the Available Space Around Every Door
Before ordering casing, measure the clear wall space around each opening.
Check the distance from the jamb to:
- The ceiling
- A nearby wall
- An inside corner
- A cabinet
- A closet opening
- A light switch
- A thermostat
- A tile edge
- A stair wall
- A bulkhead
- A beam
- Ductwork
Do this on both sides of the door and above the head jamb.
Do not assume matching doors have matching conditions.
One bedroom door may have ten inches of clear wall above it. Another door of the same size may sit directly below a basement bulkhead.
That second opening may decide which casing can be used throughout the project.
Basement Doors Need a Separate Casing Decision
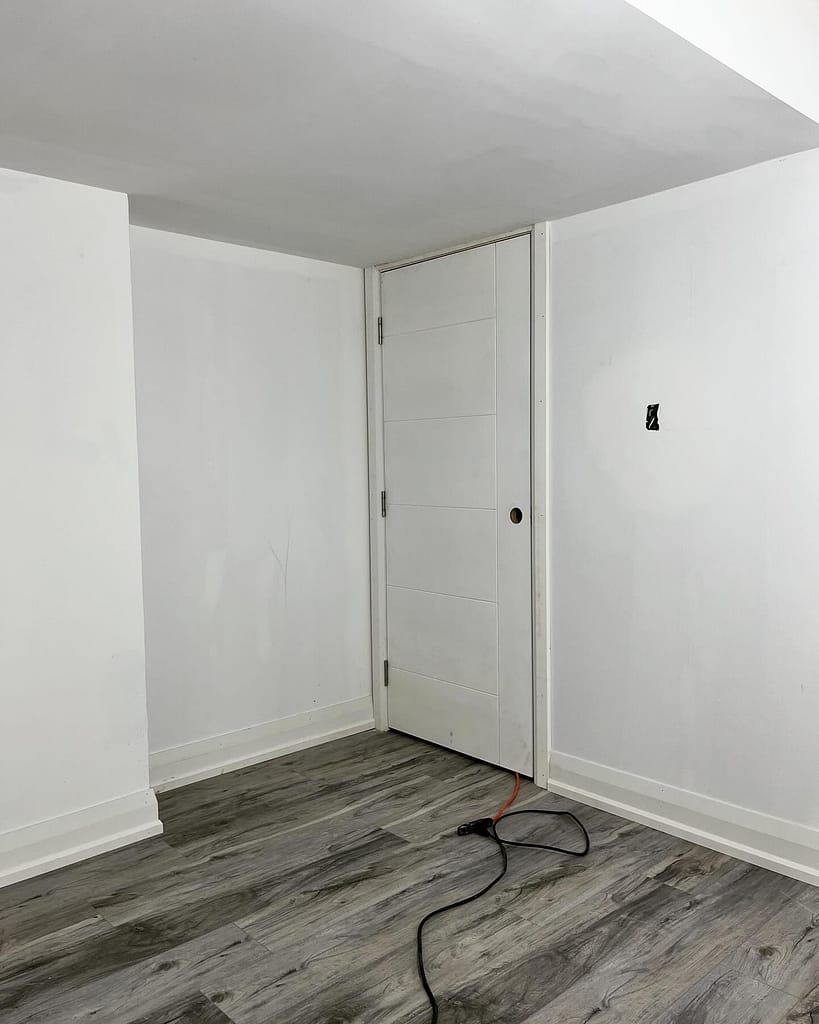
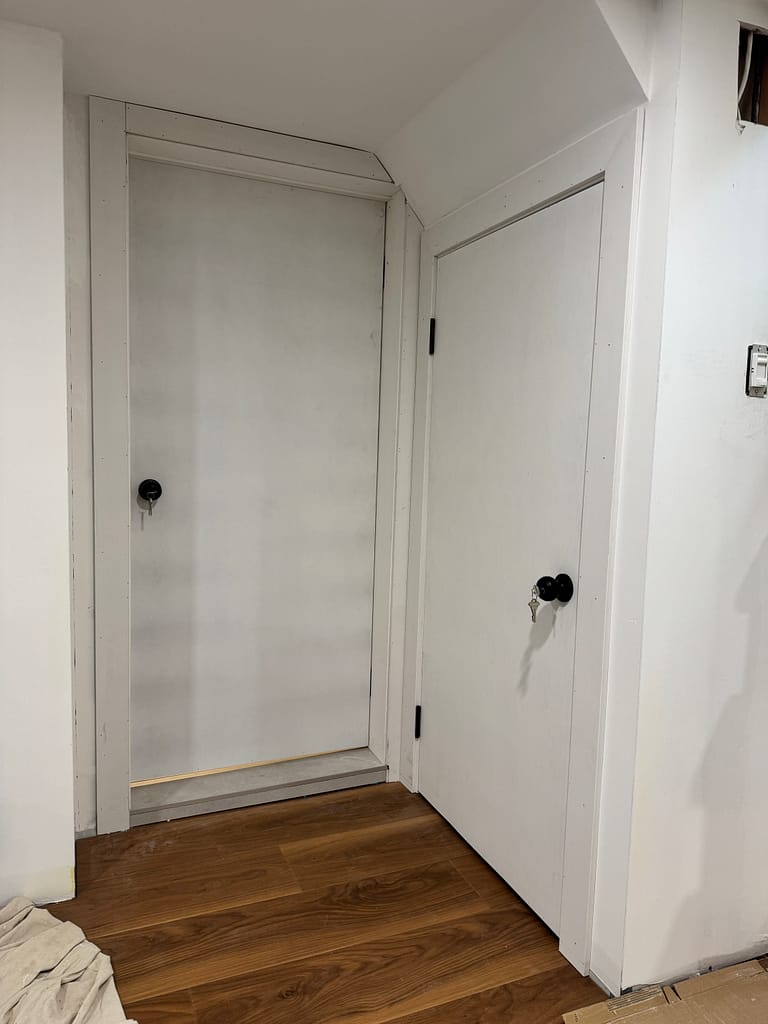
Basements often expose the weakness in a casing selection.
The doors may be affected by:
- Low ceilings
- Short rough openings
- Bulkheads
- Beams
- Ductwork
- Sloping stair framing
- Mechanical-room layouts
- Uneven drywall
- Out-of-level ceilings
- Limited wall space
- Non-standard jambs
A casing that works easily on the main floor may not fit above a basement door at all.
When There Is Not Enough Space Above the Door
The head casing normally frames the top of the door with a consistent reveal.
But imagine that the door is located below a bulkhead.
There may be 3½ inches of room above the jamb on the left side and only 2¾ inches on the right because the bulkhead is not level.
A full 3½-inch casing cannot fit evenly.
One possible solution is to taper the head casing. Its bottom edge remains aligned with the door opening while the top edge is cut to follow the available space.
The casing may therefore remain almost full width at one end and become narrower at the other.
Technically, the piece fits.
Visually, the result depends heavily on the profile.
Why Detailed Profiles Can Look Bad When Tapered
On flat casing, a gradual taper may remain relatively quiet.
On heavily profiled casing, the same cut can create a very obvious problem.
As the casing narrows from one side to the other:
- Decorative steps become thinner
- Curves appear to move
- The centre of the profile shifts
- One end may lose part of the design
- Shadow lines stop running parallel
- The slope of the ceiling or bulkhead becomes more visible
Instead of hiding the imperfect condition, the profile outlines it.
The more complicated the profile, the more obvious the distortion can become.
For a basement with tight clearances or uneven ductwork, a simple flat casing or a restrained stepped profile is often the safer choice.
In some cases, a square-cut flat-stock header or an intentionally designed Craftsman-style head detail can manage the condition more cleanly than ornate casing with mitred corners.
The detail should look planned—not squeezed into the remaining space.
Wood Job’s project guide to custom basement storage doors and low openings shows why basement doors, casing, baseboards, stairs and nearby surfaces have to be considered together.
The Same Problem Can Occur Beside the Door
Limited clearance is not only a header problem.
A door jamb may sit very close to:
- An inside corner
- A side wall
- A cabinet
- Another doorway
- A stair opening
- A utility panel
- A finished column
One side casing may need to be ripped narrower or scribed to the nearby surface.
Again, flat casing tolerates this more gracefully.
With an ornate profile, narrowing one side may remove part of the design and make the two sides of the opening look unrelated.
This does not mean decorative casing can never be used in a basement.
It means every opening must be checked before the profile is ordered.
A related Burlington project shows how basement doors in non-standard openings can be affected by short framing, uneven conditions and surrounding finish details.
Window Casing Has Its Own Constraints
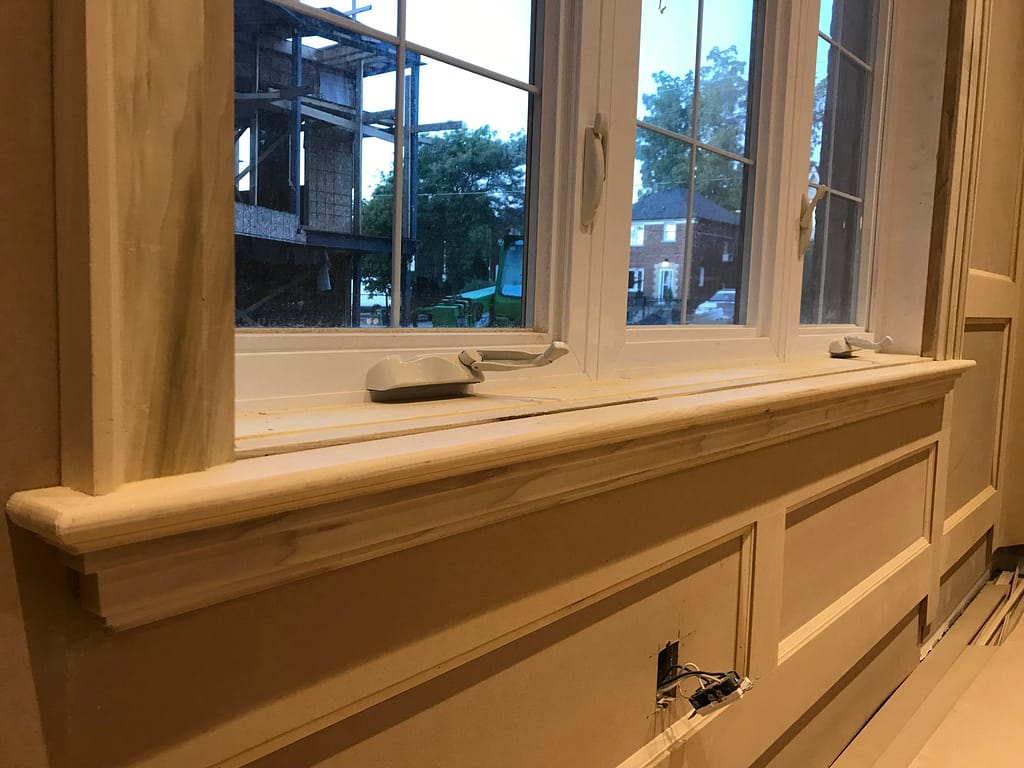
Window casing often uses the same profile as door casing, especially when the openings are visible from the same room.
That consistency usually works well.
However, windows introduce additional conditions:
- The window may sit deep behind the drywall
- A jamb extension may be required
- The opening may be close to a ceiling
- Cabinets may sit beside the window
- A backsplash may limit the lower or side casing
- The window may be close to an inside corner
- Two windows may be too close together for full casing on both sides
- The sill, stool or apron may change the trim design
Casing cannot correct a deep window opening by itself.
If the window frame sits behind the drywall plane, a properly fitted jamb extension may be needed before the casing can be installed.
A full-house Oakville project involving interior doors, casing and custom window extensions shows how window depth and trim have to be treated as one detail.
Casing Around Tile, Cabinets and Backsplashes
Kitchen and bathroom windows deserve special attention.
A casing profile may need to meet:
- Tile
- Existing backsplash
- Upper cabinets
- Countertops
- Shower finishes
- Uneven drywall-to-tile transitions
Wider is not automatically better.
A wide casing may cover more of the surrounding damage, but it can also collide with cabinets or leave an awkward narrow strip of tile.
A heavily detailed profile may be difficult to fit against an uneven backsplash because every small change becomes visible in its shadow lines.
In a real Mississauga kitchen window casing replacement, the existing backsplash, nearby cabinetry and available opening width all affected how the new casing had to be handled.
The visible condition around the window matters more than the number printed on the casing label.
Should Door and Window Casing Match?
In most rooms, matching door and window casing creates a calmer and more consistent interior.
That does not mean every piece must always have the same width.
A difficult window beside a cabinet may require an adjustment. A basement door below a bulkhead may need a simpler treatment.
When an exception is necessary, try to preserve at least some consistency:
- Use the same material
- Keep the same paint finish
- Stay within the same profile family
- Use intentional transitions
- Avoid changing styles randomly from one opening to the next
The goal is not perfect sameness at any cost.
The goal is for the exceptions to look deliberate.
When Wider Casing Usually Works Well
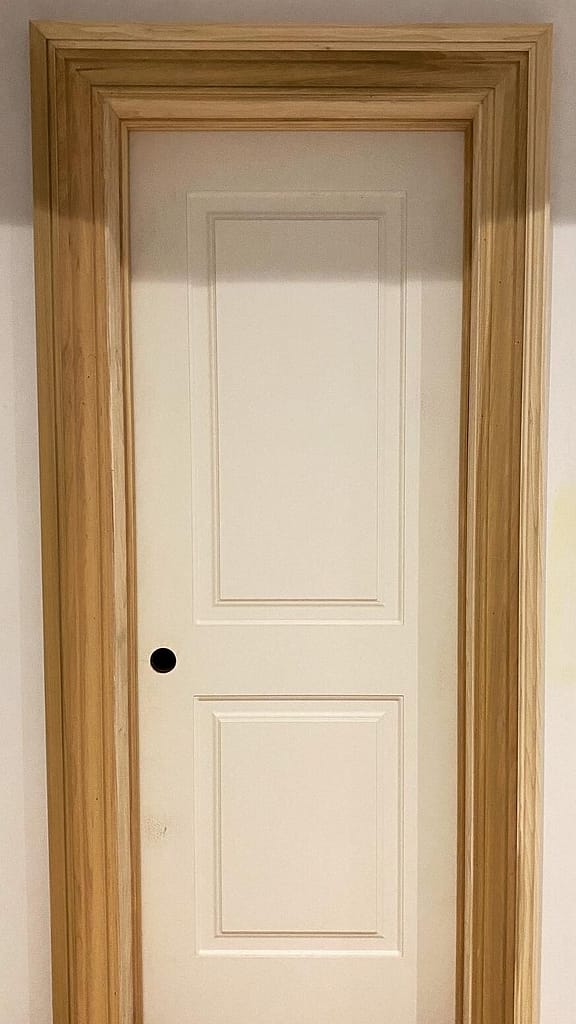
Wider casing is worth considering when the home has:
- Eight-foot doors
- Nine- or ten-foot ceilings
- Tall baseboards
- Large rooms
- Wide hallways
- Large window openings
- Craftsman or flat-stock trim
- A full-home coordinated trim package
- Enough wall space around every opening
Wider casing can give tall doors and larger rooms the visual support they need.
But it should still be checked at the tightest opening before the order is placed.
When Narrower or Simpler Casing May Be the Better Choice
A narrower or simpler casing may be more practical when the project includes:
- Standard 80-inch doors
- Low ceilings
- Basement bulkheads
- Short doors
- Tight corners
- Small rooms
- Closely spaced openings
- Windows beside cabinetry
- Uneven ceilings
- Casing that may need to be tapered or scribed
- Existing trim that is not being replaced throughout the home
Simple does not mean careless or cheap.
In a difficult opening, a clean flat profile can look more intentional than an ornate casing that has been visibly cut apart to make it fit.
Choose the Casing at the Most Difficult Opening
Before ordering material for the whole home, take a full-size sample to the project.
Place it around:
- The lowest basement door
- The opening closest to a corner
- The window beside the kitchen cabinet
- The door below the bulkhead
- The smallest storage opening
- The location where casing meets the tallest baseboard
Do not test it only around the easiest bedroom door.
The most difficult opening often reveals whether the profile can be used consistently.
This is especially important when casing is being special ordered or when several rooms are receiving the same trim package.
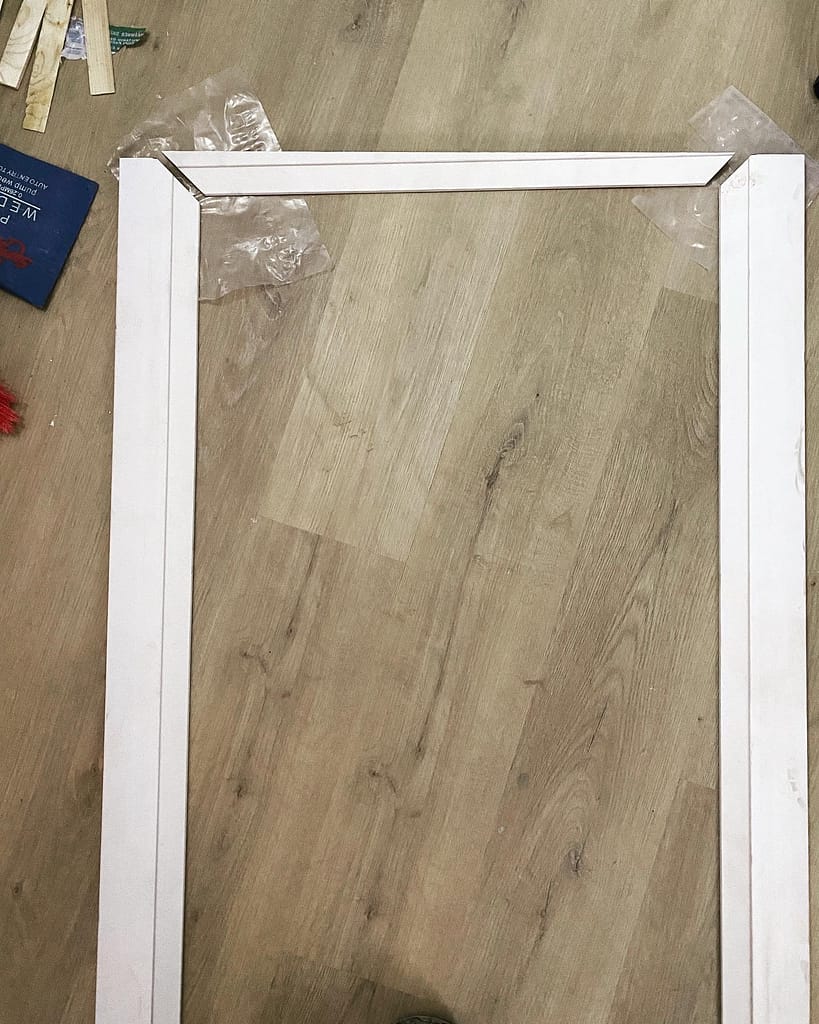
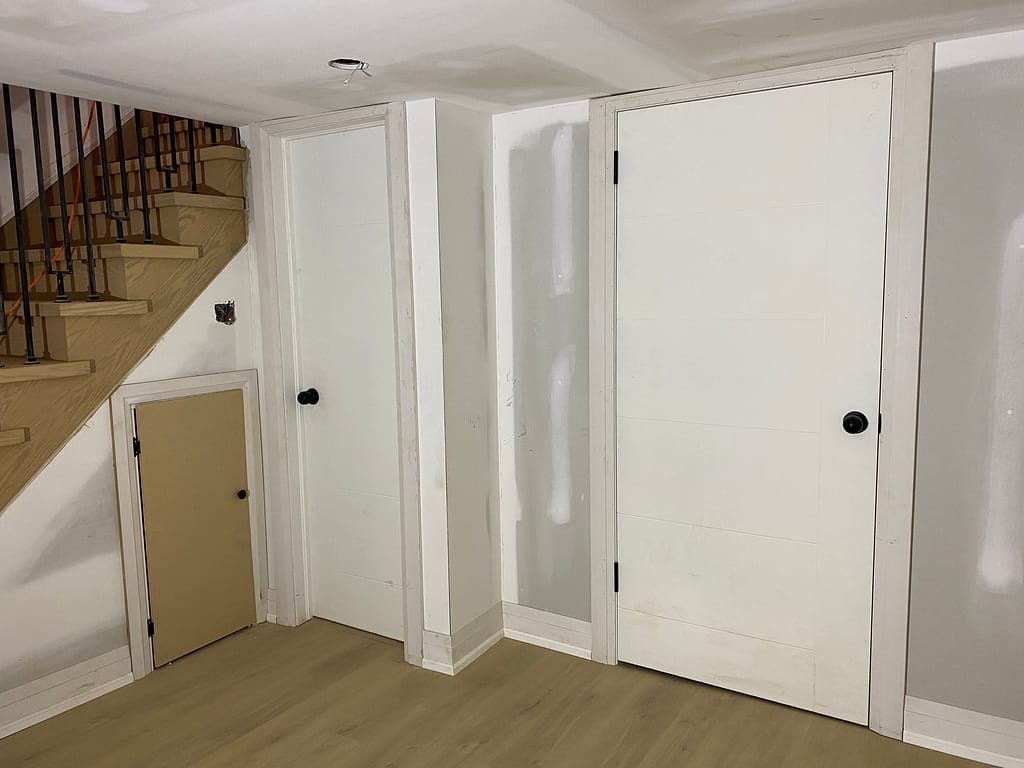
What Wood Job Checks Before Installing Casing
Before selecting or installing casing, Wood Job looks at the actual openings.
That includes:
- Door and window dimensions
- Jamb condition
- Jamb depth
- Reveal around the opening
- Drywall position
- Available headroom
- Side-wall clearance
- Ceiling and bulkhead level
- Door height
- Baseboard height and thickness
- Window extensions
- Tile and cabinet locations
- Profile repeat
- Mitred or square-cut corner design
- Whether the casing must be tapered, ripped or scribed
- Consistency between nearby rooms and openings
A casing profile should not be chosen only because it looks good in a catalogue.
It has to survive contact with the real house.
Planning Door or Window Casing?
Send clear photos of the complete openings, not only close-ups of the old trim.
Include:
- Project city
- Number of doors and windows
- Door and window heights
- Available space above and beside each opening
- Photos of basement bulkheads or ductwork
- Existing baseboard dimensions
- New casing profile and dimensions
- Photos of nearby corners, cabinets and tile
- Information about whether the jambs are staying
- Any full-home trim inspiration images
For difficult openings, one wide photo showing the surrounding ceiling, floor and walls is often more useful than several close-up photos.
You can send the details through Wood Job’s photo-based estimate page.
Door and Window Casing Questions
What is the standard width for interior door casing?
A 2¼-inch casing is one of the most common standard residential sizes. Casing between approximately 2½ and 3½ inches is also widely used. The best width depends on the door height, baseboards, room scale, profile and available space around the opening.
Is 3½-inch casing too wide for a standard interior door?
Not necessarily. A 3½-inch casing can work well with flat modern profiles, tall baseboards or more substantial doors. Every opening should still be checked for nearby corners, ceilings, switches, cabinets and basement bulkheads before the material is ordered.
Should window casing be the same width as door casing?
Usually, matching profiles help the room feel consistent. A particular window may require a narrower or modified detail because of cabinets, tile, corners or limited wall space. Any variation should look intentional rather than accidental.
Should casing be narrower than the baseboard?
Casing width and baseboard height do not need to match. The casing is commonly narrower across its face than the baseboard is tall. More importantly, their styles and thicknesses should work together where the baseboard meets the side casing.
Should casing be thicker than the baseboard?
In many trim packages, yes. The casing should generally project enough from the wall to receive the baseboard cleanly. If the baseboard is thicker, a backband, plinth block, return or different material combination may be needed.
Can door casing be cut narrower to fit below a basement bulkhead?
Yes, but the casing profile determines how clean that adjustment will look. Flat or lightly detailed casing can usually tolerate tapering better than a heavily profiled casing. Ornate curves and steps may become visibly distorted when the material changes width across the opening.
What casing style works best in a basement with uneven ceilings?
Simple flat casing or a restrained stepped profile is usually easier to manage around low ceilings, bulkheads and ductwork. The best choice still depends on the other doors, baseboards and trim already used in the basement.
Can the header casing be wider than the side casing?
Yes, when it is part of an intentional design such as a Craftsman-style header, architrave or built-up trim assembly. A wider header should look deliberately designed rather than like a standard piece was altered to hide a problem.
Do deep windows need jamb extensions before casing?
Often, yes. If the window frame sits behind the finished drywall surface, a jamb extension bridges that depth and gives the casing a proper surface to meet. Casing alone should not be used to disguise an unfinished deep opening.
Does Wood Job install casing as a small standalone project?
Yes. Wood Job can help with individual door or window casing projects as well as larger door, baseboard and full-home trim packages. Small projects still need clear photos and measurements so the existing jamb, drywall, profile and surrounding conditions can be reviewed.




