
The front entrance shapes the first view of a home.
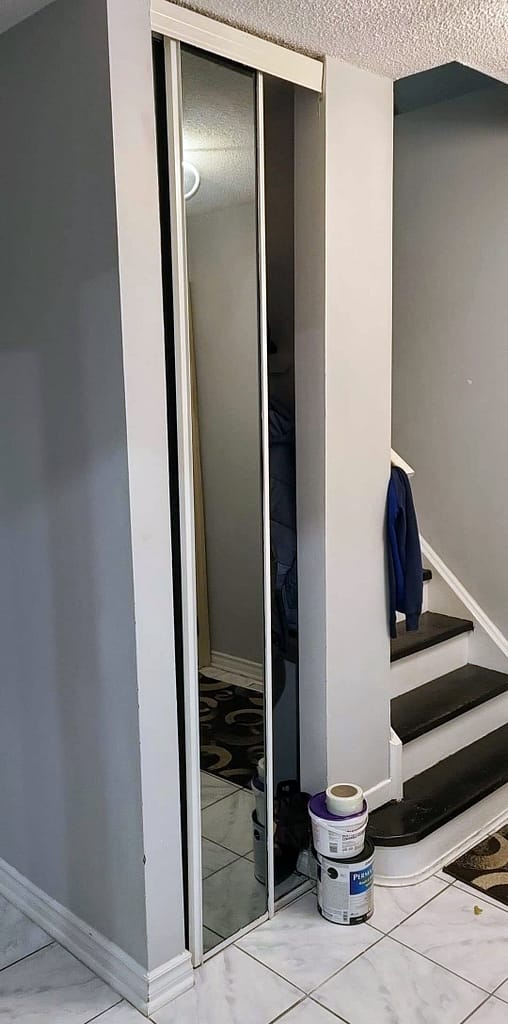
In this Milton house, opening the front door brought a floor-to-ceiling mirrored sliding closet door directly into view. The closet itself was useful, but the homeowner did not like how strongly the large mirror and sliding-door frame dominated the entrance.
They wanted the closet to feel more like a natural part of the house: a standard hinged door with the same panel style as the other interior doors.
This was a relatively contained project, but it required much more than exchanging one door for another.
For homeowners planning similar work, Wood Job also has a dedicated local page for interior door installation in Milton.
★★★★★
76 Google Reviews.
Earned One Job at a Time.
Real projects. Real homes. Real customers.
Wood Job Finish Carpentry is trusted by homeowners in Milton who care about clean work, careful details, direct communication and finish carpentry that is handled with personal responsibility.
The Existing Mirrored Closet Door
The original closet had a tall mirrored sliding-door system running almost from the floor to the ceiling.
A sliding closet door and a standard hinged door require completely different openings. Removing the mirror panels and installing a regular door inside the same space would have left an opening that was too wide and too tall.
The existing opening first had to be rebuilt around the proportions of the new door.
That meant treating the work as a small opening conversion rather than a simple interior door replacement.
Resizing and Reframing the Opening
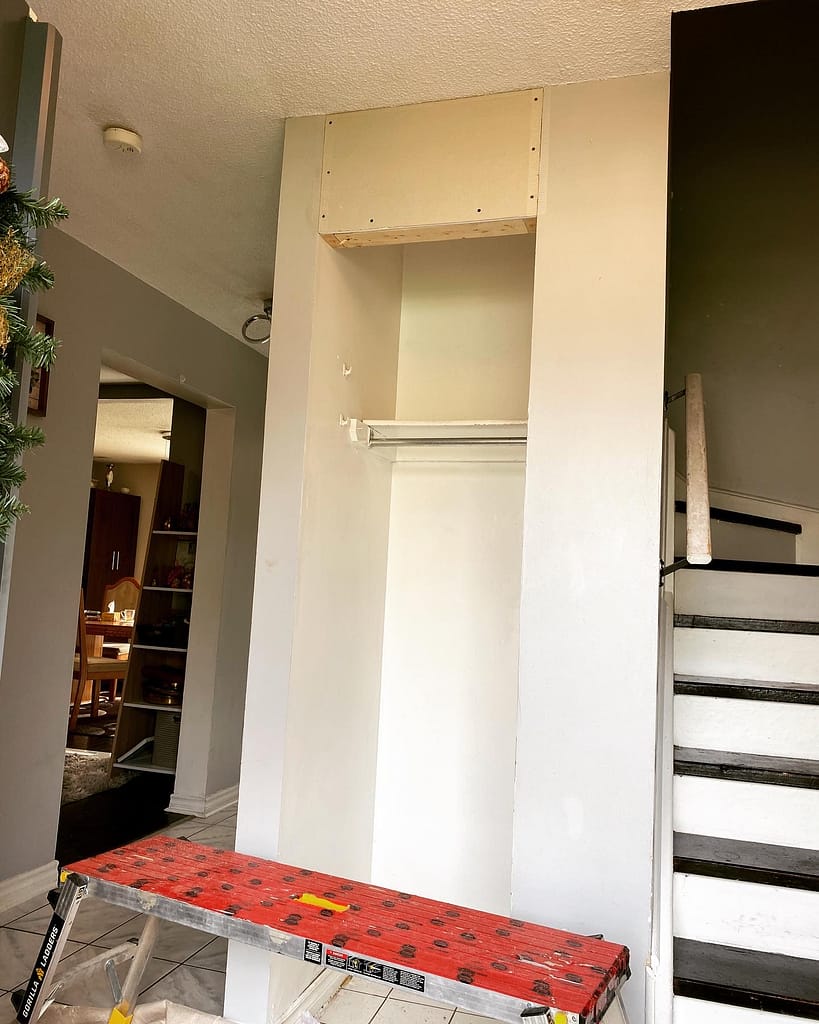
After removing the mirrored doors, tracks and surrounding components, I reduced the existing opening to suit the new hinged closet door.
New framing established the correct width and height while preserving the usable closet space behind it. The upper part of the old opening was then closed with drywall, creating a properly proportioned wall area above the new door.
This stage determined whether the finished opening would look original to the house or like a smaller door inserted into a visibly altered space.
The framing had to provide:
- The correct rough-opening dimensions
- Solid support for the new jamb
- A suitable wall surface above and beside the door
- Enough room for consistent casing
- A practical door swing beside the staircase and entryway
Projects like this are a good example of why non-standard openings and dated closet-door systems sometimes need more than a standard installation price or a one-step solution.
Drywall, Taping and Sanding Were Part of the Conversion
Once the framing was complete, drywall was installed over the rebuilt section of the opening.
The joints then had to be taped, coated and sanded so the new drywall could disappear into the existing wall. This matters particularly in an entrance, where natural and artificial light can make ridges, sanding marks and uneven transitions easy to see.
Installing the door and casing without completing the surrounding wall would have left the homeowner coordinating another contractor for a relatively small finishing stage.
Instead, the opening was taken from demolition through to a paint-ready—and ultimately painted—result as one connected scope.
Installing the Hinged Closet Door and Casing
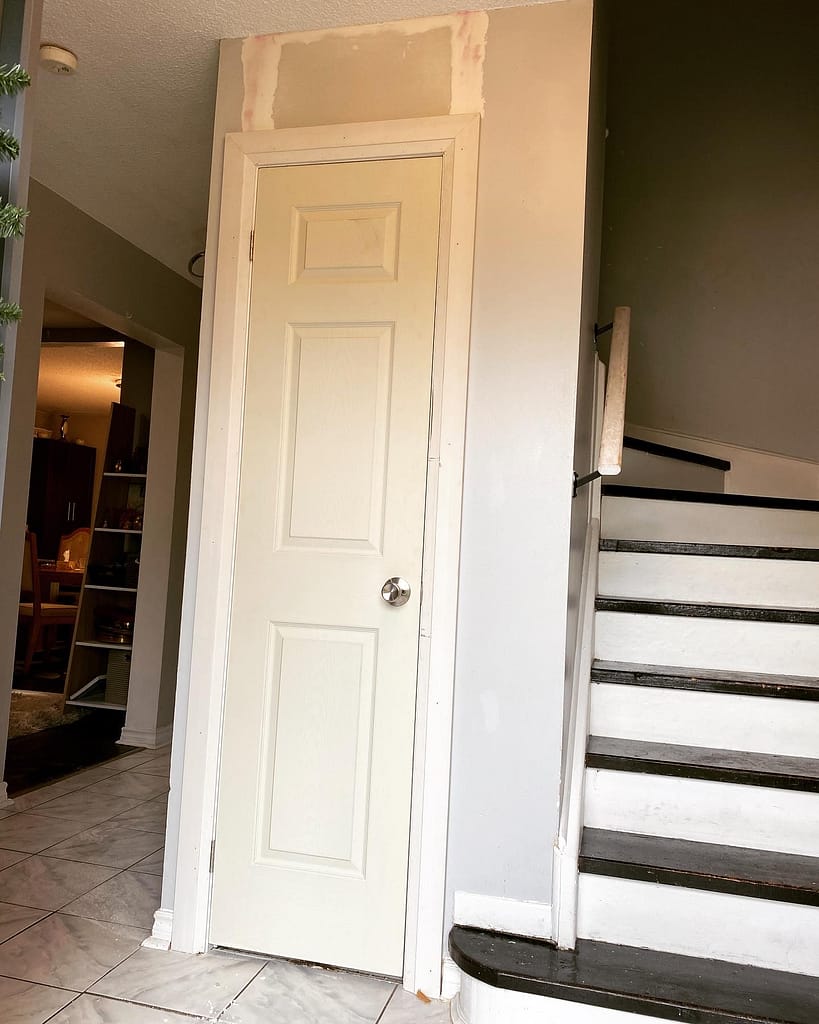
The new panel door was fitted into a jamb and installed as a conventional hinged closet door.
Its panel design relates to the other interior doors in the home, which makes the closet feel less like a separate feature and more like part of the original entryway. Casing was installed around the new opening to create a clean transition between the jamb and rebuilt wall.
The placement also had to work with the staircase immediately beside the closet. This was not an opening where the door, casing and surrounding wall could be considered separately. Their proportions had to make sense together within a narrow and highly visible part of the home.
Matching the Existing Wall Finish
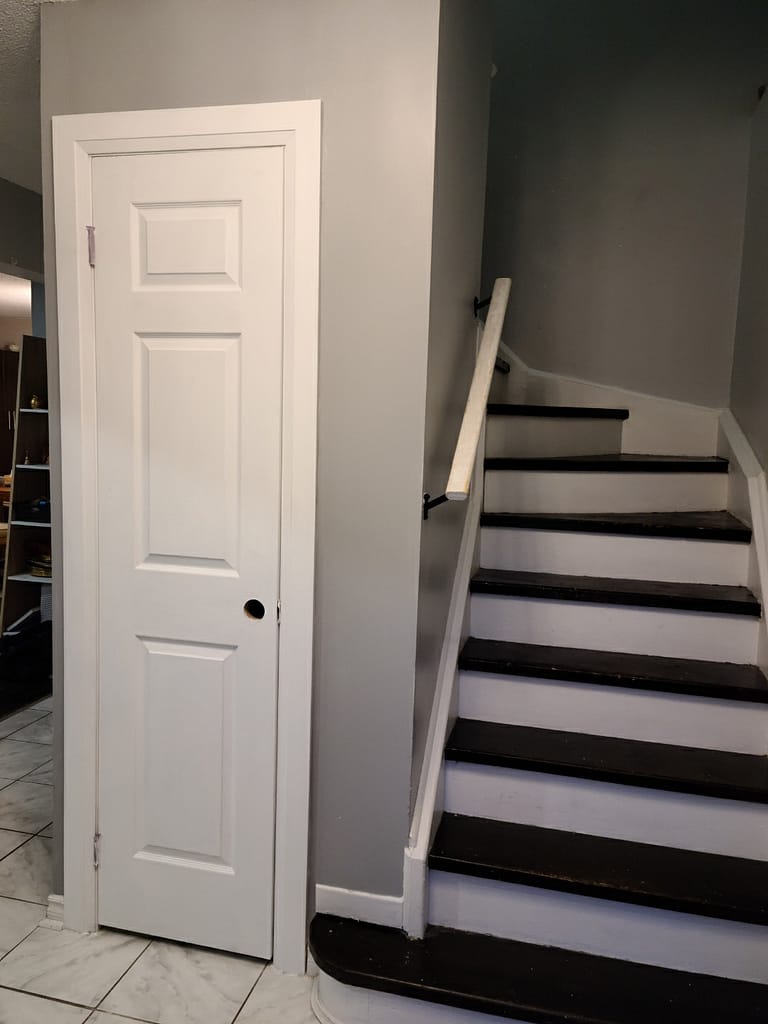
After the drywall compound had dried and been sanded, the repaired area was primed and painted to match the surrounding grey walls.
This final stage changed how the entire conversion read.
Before the work, the full-height mirrored panels formed a strong reflective surface directly across from the entrance. Afterward, the painted wall, white casing and panel door created a quieter composition beside the staircase.
The closet remained fully functional, but it no longer controlled the first impression of the entryway.
A Small Project with a Complete Scope
This was not a whole-home renovation or a large trim package.
It was one visible problem in an important location.
However, solving it properly involved several connected stages:
- Removing the mirrored sliding doors and tracks
- Resizing and framing the opening
- Installing new drywall
- Taping, coating and sanding the joints
- Preparing and installing the hinged door and jamb
- Installing the casing
- Priming and matching the existing wall colour
Stopping after only the carpentry would have left an unfinished drywall repair. Treating the wall separately from the door could have produced an opening whose proportions or casing did not work with the final surface.
Completing the connected stages together allowed the new door to look settled into the entrance rather than added afterward.
This is the kind of focused work Wood Job handles for homeowners looking for a finish carpenter in Milton: not necessarily the largest project in the house, but one where the final result depends on understanding everything around the door.
Planning a Similar Closet Door Conversion?
An old mirrored, bifold or sliding closet door can often be replaced with a hinged door, but the existing opening must be assessed first.
Useful starting information includes:
- Photos of the complete closet opening
- Opening width and height
- Photos showing the nearby walls, staircase or furniture
- The desired door style
- Preferred swing direction
- Existing flooring
- Whether the surrounding wall must also be finished and painted
- Project city
Wood Job can review the opening and determine whether a standard door will work or whether framing, drywall, a custom jamb or additional finishing will be required.
Related Services
Finish Carpenter in Milton
See how Wood Job Finish Carpentry helps Milton homeowners with doors, trim, baseboards, casing, fireplace details, window extensions and renovation finishing.
Interior Door Installation in Milton
Interior doors, double doors, French doors, hardware, reveals, jambs, and custom fitting for finished residential spaces and existing interior openings.
Finish Trim Carpentry
Casing, jambs, baseboards, door trim, window trim, reveals, transitions, and final finish details that help a custom door system look built into the home.




