A baseboard runs along the floor. Door casing frames an opening.
They may be displayed on separate racks and ordered at different times, but inside the home they meet at the bottom of almost every doorway. That small connection reveals whether the trim package was planned as one system or assembled from unrelated pieces.
Two profiles can look good individually and still look wrong together.
The casing may be too thin to receive the baseboard cleanly. A tall baseboard may overpower a narrow casing. Decorative curves may collide at the joint. A wider casing may suit the main hallway but need to be cut down at several other doors.
The right decision is not simply to choose the most attractive casing and then find a baseboard in the same colour.
The door, jamb, casing, baseboard, flooring and surrounding wall space should be considered together.
★★★★★
69 Google Reviews.
Earned One Job at a Time.
Real projects. Real homes. Real customers.
Wood Job Finish Carpentry is trusted by homeowners, contractors, designers, and realtors who care about clean work, careful details, direct communication and finish carpentry that is handled with personal responsibility.
Baseboard and Casing Do Not Have to Match Exactly
Matching does not mean repeating the same shape twice.
A flat-stock casing can work with a simple bevelled or stepped baseboard. A traditional casing can be paired with a baseboard that uses a related profile without copying every curve. Different materials may also be combined in a paint-grade trim package when there is a practical reason to do so.
What matters is whether the pieces appear to belong in the same room.
That normally involves four decisions:
- Profile style
- Width and height
- Material thickness
- The way the pieces physically meet
A simple Shaker door, flat casing and restrained baseboard can form a clean modern system. A traditional door may support more detailed casing and baseboard profiles. Neither approach is automatically better.
The pieces need to support one another without competing for attention.
Start with the Casing-to-Baseboard Joint
Before ordering material for the whole house, place a short piece of casing and baseboard together exactly as they will meet beside a door.
Do not examine only their front faces.
Look at the joint from the side.
In many trim packages, the casing projects slightly farther from the wall than the baseboard. This allows the end of the baseboard to meet the casing without sticking out in front of it.
If the baseboard is thicker than the casing, the baseboard may project beyond the casing face. Depending on the profiles, that can leave an exposed edge or make the connection appear improvised.
This does not mean that casing must be thicker in every possible design. A plinth block, backband, custom return or built-up trim detail may intentionally change the relationship. But if none of those features is planned, the two thicknesses should be checked before the material is ordered.
A profile photograph or catalogue page will not show this clearly. Full-size samples will.
Proportion Matters, but There Is No Universal Formula
The casing width and baseboard height should feel balanced with the opening and the room.
A narrow casing can look weak beside an eight-foot solid-core door and tall baseboards. A very wide or decorative casing can overwhelm a standard bedroom door, a short storage door or a low basement opening.
The decision may be affected by:
- Door height and width
- Door panel style
- Ceiling height
- Baseboard height
- Casing width
- Crown moulding
- Wall paneling
- Flooring and shoe moulding
- Room size
- Existing trim elsewhere in the home
There is no dependable formula stating that every baseboard must be a particular multiple of the casing width. Real rooms contain too many variables for one ratio to solve every project.
The combination should be judged at full scale and inside the actual home.
Homeowners comparing casing dimensions can also read How Wide Should Door and Window Casing Be?, which looks more closely at standard widths, door proportions and difficult openings.
The Available Space Around the Doors Can Limit the Choice
This is especially important during trim replacement.
A homeowner may want to replace an existing 2¾-inch casing with a 3½-inch profile. The wider casing may look more substantial around an open hallway door, but that does not mean it will fit properly around every opening in the house.
Before ordering wider casing, check the distance from each jamb to:
- A nearby inside corner
- The ceiling
- A basement bulkhead
- Ductwork
- A light switch or thermostat
- A cabinet
- A tile edge
- A stair wall
- Another door opening
- A closet or return wall
The old casing may already occupy most of the available space.
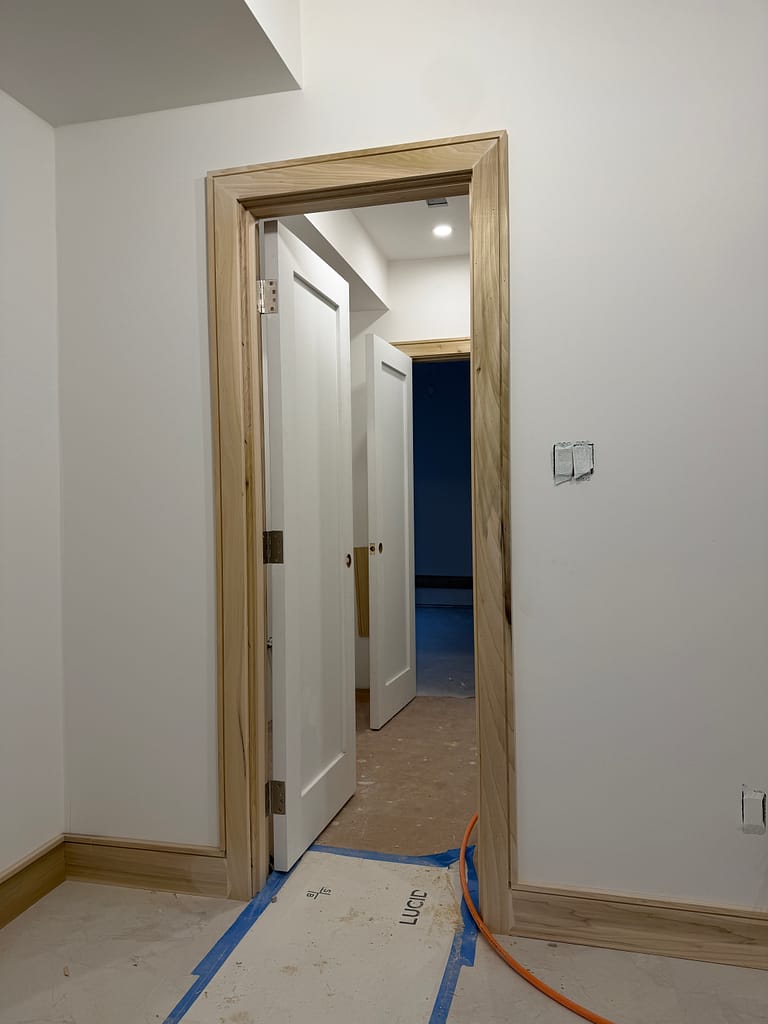
If a wider flat casing needs to be reduced slightly at one discreet location, the adjustment may remain reasonably quiet. A heavily profiled casing behaves differently. Ripping it narrower may remove a bead, step or curve from one side.
The result may leave one door with a full profile and another with part of the design missing. Mitres may no longer align properly. A centred detail may move visibly off-centre.
If this happens at one hidden basement opening, an intentional exception may be possible. If it happens around several doors in hallways and other visible areas, the casing was probably too wide for the home.
Sometimes the condition of the house has to be accepted.
A narrower profile used consistently can look far better than a wider decorative profile that has been visibly cut apart throughout the project. Good trim selection respects the available space instead of forcing a catalogue image into a house that cannot support it.
Choose the Profile at the Most Difficult Opening
The easiest bedroom door should not make the decision for the whole house.
Take the proposed casing sample to:
- The lowest basement door
- The door closest to a wall
- The opening below a bulkhead
- The window beside a cabinet
- The narrowest section between two openings
- The location with the least space above the jamb
- The doorway where the tallest baseboard will meet the casing
If the casing can work cleanly at those locations, it will usually be easier to use throughout the rest of the project.
This becomes even more important with decorative profiles. Flat or lightly detailed casing can tolerate certain modifications. Profiles with deep curves, multiple steps or narrow channels leave much less room for adjustment.
The most difficult opening often tells the truth about the material before an entire house worth of trim is ordered.
Casing and Baseboard Profiles May Need to Continue Through Each Other
Some trim packages have more than a general stylistic relationship.
The profiles are designed to connect.
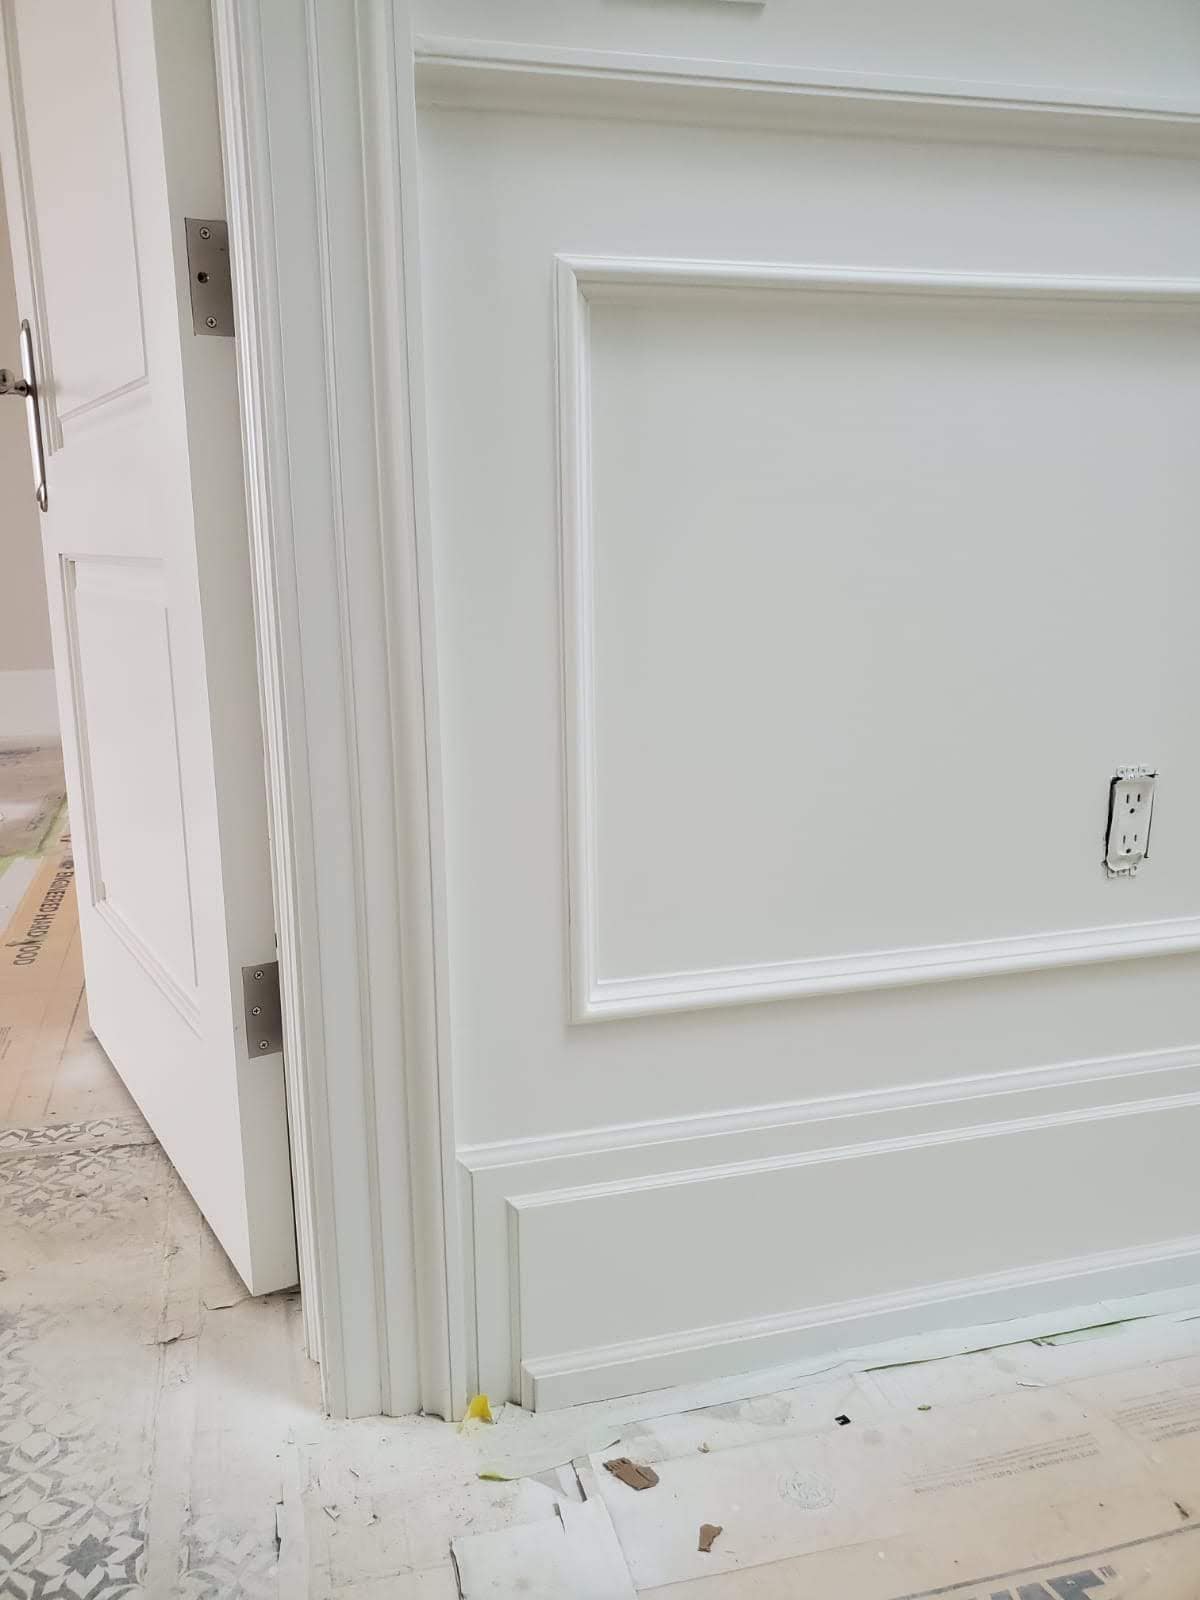
Wood Job completed a Toronto bungalow renovation involving solid doors, casing, baseboards and custom window extensions where both the casing and baseboard contained a continuous channel detail.
The channel travelled from the baseboard into the side casing, continued across the head casing, came down the other side of the door and returned to the baseboard.
That line had to meet at the correct height on both sides of every opening. If the baseboard was installed slightly too high, the channel would miss the corresponding detail in the casing. If the casing cuts or mitres changed the position of the profile, the line would appear broken as it travelled around the door.
In that kind of project, casing and baseboard cannot be treated as two products that merely happen to share a colour. Their measurements and installation sequence are directly connected.
Not every home needs such a detailed profile. But the project demonstrates the broader rule clearly: examine how the baseboard ends and how the casing receives it before choosing either piece.
The Door Is Part of the Trim Decision
Casing does not frame an empty rectangle. It frames a particular door.
A plain slab door, a one-panel Shaker door, a traditional six-panel door and an eight-foot solid-core door do not have the same visual weight.
The casing should support the door style without making the opening feel weak or overly decorated.
For example:
- A simple Shaker door often works well with flat or restrained stepped trim.
- A traditional panel door may support a more detailed casing profile.
- Tall solid-core doors may need more substantial casing and baseboards to feel balanced.
- Short basement or storage doors usually benefit from simpler proportions.
- French doors, transoms and wide cased openings may justify a wider or built-up casing design.
The jamb depth, reveal around the door and hardware finish also contribute to the opening. Homeowners planning to replace doors and trim together can review Wood Job’s interior door installation and replacement service for the other conditions that should be checked.
Existing Trim Changes the Answer
A full-home trim replacement provides more freedom than changing the baseboards and casing in one room or on one floor.
For a partial replacement, the new trim must also be considered beside:
- Casing in adjoining rooms
- Baseboard continuing through hallways
- Window trim
- Stair trim
- Existing crown moulding
- Wall paneling
- Cabinetry
- Openings where old and new trim will meet
A profile can be attractive on its own and still feel disconnected from everything around it.
That does not mean new trim must copy an outdated profile exactly. Sometimes a transition between old and new areas can be placed at a doorway, stair landing or other natural break. The important point is to decide where that transition will occur before material is installed.
Wall Paneling and Shoe Moulding Complete the Picture
Baseboard, casing and wall paneling should not be planned as three unrelated stages.
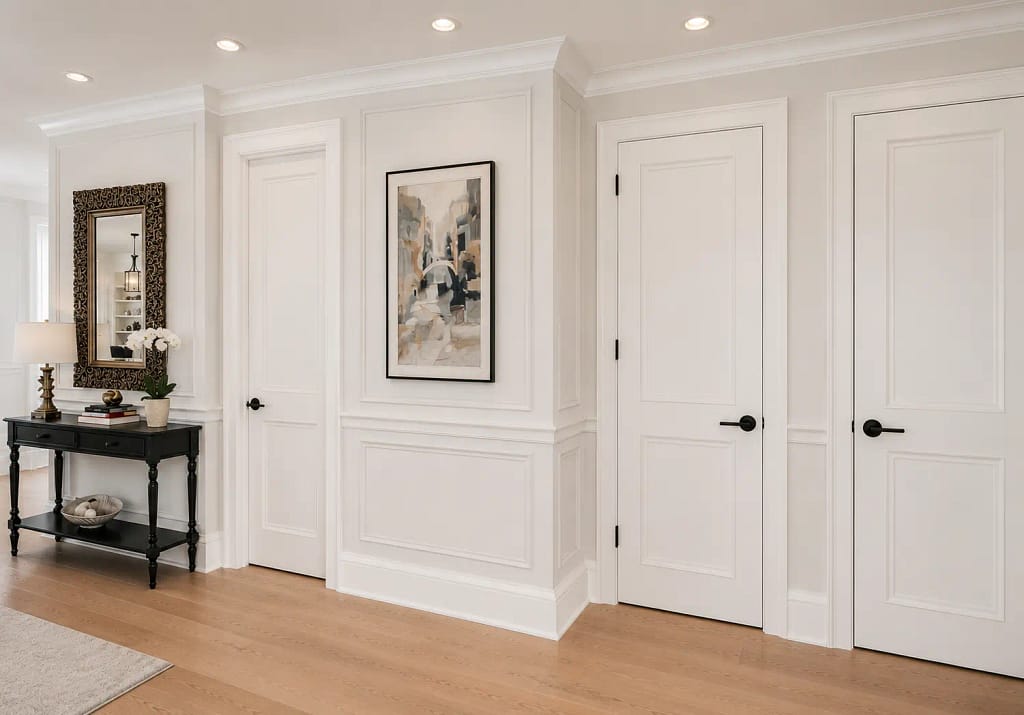
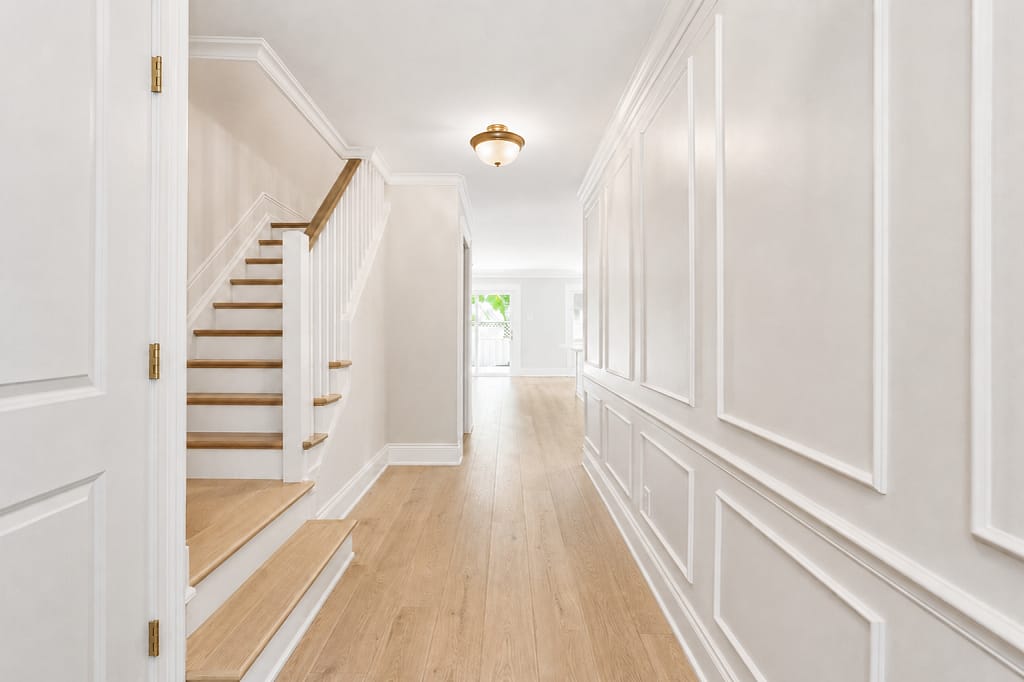
Panel moulding or vertical stiles may meet the side casing. The baseboard may form the lower boundary of the panel design. A shoe moulding can change how much visual weight appears at the floor.
These details affect spacing.
A wall panel layout that looks balanced on an empty wall may become crowded once the door casing is widened. A baseboard with a large upper profile may interfere with the bottom rail of the paneling. A thick shoe moulding can make an already substantial baseboard feel heavier.
The full wall should be considered before the first piece is cut.
Material Choice Still Matters
Baseboard and casing do not always have to be made from the same material, particularly when both will receive a painted finish.
MDF, poplar and finger-jointed pine each behave differently. Profile availability, thickness, durability, moisture exposure and the type of modification required may affect the choice.
For example, a project that needs custom milling, substantial ripping or a built-up detail may benefit from real wood in certain locations. Standard paint-grade MDF can still be practical for many dry interior baseboard and casing applications.
The material should be chosen according to the project rather than the assumption that one material is always superior.
Wood Job’s baseboard installation, casing and interior trim service page explains how profile, material, flooring, wall condition and installation sequence work together in real homes.
A Practical Way to Compare Baseboard and Casing
Before ordering the complete trim package:
- Confirm the door style and heights.
- Measure the existing baseboard and casing.
- Obtain full-size samples of the proposed profiles.
- Hold the casing and baseboard together at a real doorway.
- Check their thicknesses from the side.
- Compare the profiles where they meet.
- Test the casing at the tightest and lowest openings.
- Check nearby corners, switches, cabinets, tile and bulkheads.
- Include shoe moulding and wall paneling in the comparison.
- Decide where new trim will transition into existing trim.
- Confirm that any channels, steps or other profile details can align.
- Only then order the full quantity.
This short test can prevent a large material order from becoming a series of compromises during installation.
The House Has the Final Say
Casing and baseboard should be chosen as a coordinated trim system.
They do not need to be identical. They do not always need to come from the same collection. But their profiles, thicknesses, scale and connection points should make sense together.
The selection also has to work in the actual house.
A 3½-inch casing may look excellent in the showroom and still be wrong for a home where it must be narrowed around most doors. A detailed baseboard may look good in a sample but fail to connect cleanly with the casing profile. A continuous channel can create an excellent finished detail, but only if both pieces are planned and installed as one system.
The goal is not to force the largest or most decorative trim into the space.
The goal is to choose a combination that can remain balanced and consistent once it meets the real doors, walls, floors and openings of the home.
Planning a Baseboard and Casing Project?
Send clear photos showing the complete door openings, adjoining walls, ceiling conditions and existing baseboards.
Include:
- Project city
- Number of doors and rooms
- Approximate linear footage
- Existing and proposed trim dimensions
- Photos of the profile samples
- Door and ceiling heights
- Tight openings, corners or basement bulkheads
- Information about whether the old trim will be removed
- Wall paneling or shoe moulding plans
- Inspiration photos, if available
Wood Job can review the information and determine whether a rough starting range is possible from photos or whether the trim conditions would be better assessed during a walkthrough.
Details can be sent through the photo-based estimate page.
Baseboard and Door Casing Questions
Do baseboards and door casing have to match?
No. They do not need identical profiles, but they should have compatible proportions, thicknesses and design styles. The connection where the baseboard meets the casing should look planned.
Should door casing be thicker than the baseboard?
In many standard trim packages, the casing projects slightly farther from the wall so the baseboard can terminate against it cleanly. If the baseboard is thicker, the design may need a plinth block, backband, return or another intentional transition.
Can I replace 2¾-inch casing with 3½-inch casing?
Possibly, but every opening should be measured first. Wider casing may collide with nearby walls, ceilings, switches, cabinets or bulkheads. If it must be cut narrower around many visible doors, a narrower profile may produce a more consistent result.
Can decorative casing be trimmed narrower?
It can be cut, but the result depends on the profile. Ripping a decorative casing may remove part of a curve, step, bead or channel and leave the design visibly unbalanced. Flat casing usually tolerates limited adjustments better.
Should baseboard height be based only on ceiling height?
No. Ceiling height is one consideration, but door height, casing width, room size, wall paneling, flooring and existing trim also affect the decision. There is no single proportion that works in every home.
Can MDF casing be used with a wood baseboard?
Yes, especially when both pieces will be painted. Their dimensions, edge details, durability and behavior at the joint should still be compared before ordering.
What if a wide casing fits most doors but not all of them?
A small number of discreet exceptions may be handled with an intentional adjustment or a simpler treatment. If the casing must be visibly narrowed at many prominent openings, it is usually better to choose a profile that works consistently throughout the home.
How should a baseboard channel line up with door casing?
The baseboard and casing must be laid out so the channel enters the casing at the correct height, travels around the door and reconnects with the baseboard on the other side. Small height or cutting errors become visible because the continuous line will appear broken.